
← Back to articles
Building a Pokedex with React Native in forty-five minutes!
2022-09-03 · 43 min read
Let's build a Pokedex with React Native in forty-five minutes! You don't need to know any React Native before going through this, but you will need the following:
- JavaScript and React (hooks, etc.)
- Basic knowledge of Git and GitHub
- Basic knowledge of APIs - we will be using PokeAPI
- A computer (duh) with a code editor and a phone or emulator to test your creation
- macOS: Xcode
- Windows and Linux: Android Studio
- The requirements for running an Expo app, which we will discuss in more detail later:
expo-cli, which will let us create Expo projects in the command line- Make sure you meet Expo's requirements for installation
- The Expo app, which you can find in the App Store or the Play Store
The final code is located on GitHub at https://github.com/jianmin-chen/react-native-pokedex. If you're following along, you might like to work in terms of milestones. In that case, you can git clone the repository and then git checkout any of the following branches at any time to follow along:
milestone-1-preview-cards: The first milestone, where you create preview cards for the Pokemonmilestone-2-search-functionality: The second milestone, where you add search functionality to the appmilestone-3-navigation: The third milestone, where you add navigation to the app to create a bigger info page.master: The final milestone and the final project! Here, you'll set up local storage to create a Favorites screen where you can add your favorite Pokemon.
What are we going to build?
Here's what we're going to be building:
Pretty cool, right? If you have no idea what Pokemon or what a Pokedex are, you may consider Googling them before we continue. (But most likely you already know what they are, or you wouldn't be reading this, so we'll move on.)
Taking a look at the API
Okay, let's take a look at the API we'll be using now: PokeAPI. It contains all the information we'll need about every Pokemon. They don't require you to have an API key, so that's great. They also happen to have pretty decent documentation, but let's quickly take a look at the endpoints we'll be using to build our Pokedex.
https://pokeapi.co/api/v2/pokemon?limit=-1 returns something like the following:
{
  "count": 1154,
  "next": null,
  "previous": null,
  "results": [
    {
      "name": "bulbasaur",
      "url": "https://pokeapi.co/api/v2/pokemon/1/"
    },
    {
      "name": "ivysaur",
      "url": "https://pokeapi.co/api/v2/pokemon/2/"
    },
    {
      "name": "venusaur",
      "url": "https://pokeapi.co/api/v2/pokemon/3/"
    }
    ...
  ]
}
You can imagine that we'll be using this to get a list of Pokemon. In fact, we will be using this to get a random list of Pokemon!
Another endpoint that's pretty important to us is https://pokeapi.co/api/v2/pokemon/${id}, such as https://pokeapi.co/api/v2/pokemon/1 for Bulbasaur, who, fun fact, is the very first Pokemon in the Pokedex. This returns JSON that's something like this:
{
  "weight": 69,
  "height": 7,
  "moves": [
    {
      "move": {
        "name": "razor-wind",
        "url": "https://pokeapi.co/api/v2/move/13/"
      },
      ...
    },
    ...
  ],
  "types": [
    {
      "slot": 1,
      "type": {
        "name": "grass",
        "url": "https://pokeapi.co/api/v2/type/12/"
      }
    },
    ...
  ],
  "stats": [
    {
      "base_stat": 45,
      "effort": 0,
      "stat": {
        "name": "hp",
        "url": "https://pokeapi.co/api/v2/stat/1/"
      }
    },
    ...
  ]
}
There's a lot more information than this, but these are the ones we'll be using: width, height, moves, types, and stats. https://pokeapi.co/api/v2/pokemon/${name} is another important endpoint we'll be using - it does the same thing as the previous endpoint, but takes a name instead of an ID.
These are the three endpoints we'll be using!
What's React Native?
Hey, good question! Imagine React but for app development. That's what React Native is, in a nutshell! React Native takes React code you've written and compiles it to native code - code that can run on iOS (Swift) or Android (Java).
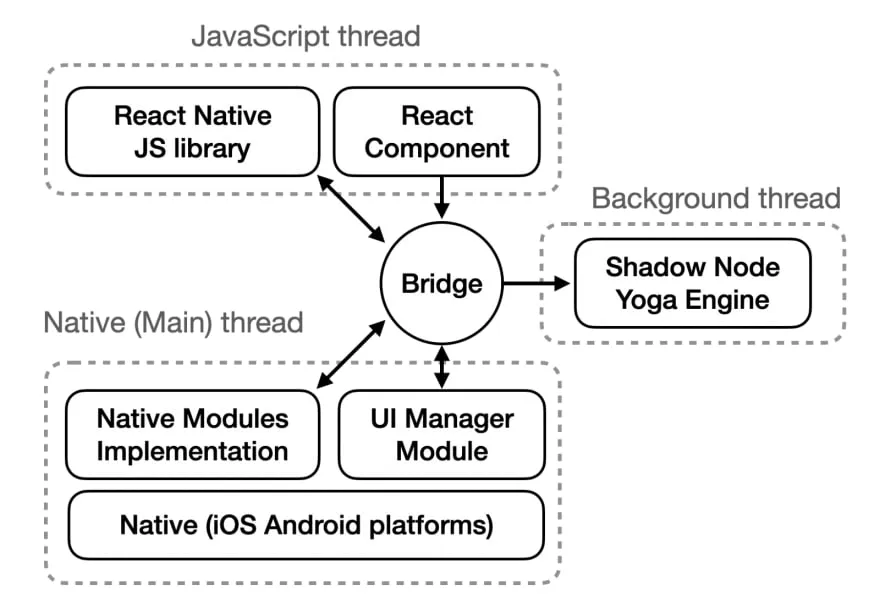 Bird's eye view of how React Native works
What about Expo? Well, you can expect that for something like React Native, you're probably going to have to take a lot of steps before you can get your app up and running since you are writing code that needs to be bridged to a completely different programming language. We don't want to spend a half hour debugging that, so we're going to be using Expo. Expo is a tool that allows you to, in the words of their website, "build one project that runs natively on all your users' devices". If React Native is the tool we're using to build our apps, Expo is the tool that makes the tool easier to use.
In fact, we can set up an app, right now, in five minutes or less! Let's start by installing Expo. As mentioned in the prerequisites, Expo requires the following:
- NodeJS LTS release: that means, at the time of this writing, somewhere around 12 - 16. Try using the latest stable version if possible. If you need to update, this Stack Overflow thread may be useful.
- Git, which you should already have
- Watchman: You only need this if you're on macOS or Linux.
We will be using Expo's command line tool to create new React Native projects. After you have these prerequisites, you can simply use the Expo CLI with npx:
npx expo
Or if you would rather install it globally:
npm i -g expo-cli
# -g is deprecated
npm i expo-cli --location=global
Okay, we can set up our app now!
Setting up our app
Start a new project with npx expo init pokedex, where pokedex is the name of our project. Expo will return something like the following:
✔ Choose a template: › blank
✔ Downloaded template.
📦 Using npm to install packages.
✔ Installed JavaScript dependencies.

✅ Your project is ready!

To run your project, navigate to the directory and run one of the following npm commands.

- cd pokedex
- npm start # you can open iOS, Android, or web from here, or run them directly with the commands below.
- npm run android
- npm run ios # requires an iOS device or macOS for access to an iOS simulator
- npm run web
We're going to be using a blank template, so just press Enter at that part.
Once Expo is done installing our project, we can start running our app:
cd pokedex
npm start
> pokedex@1.0.0 start
> expo start

Starting project at /home/jchen/Programming/snippets/pokedex
Starting Metro Bundler
▄▄▄▄▄▄▄▄▄▄▄▄▄▄▄▄▄▄▄▄▄▄▄▄▄▄▄
█ ▄▄▄▄▄ █ ▄▄ ████ █ ▄▄▄▄▄ █
█ █   █ ██▄█▀▀ █▄ █ █   █ █
█ █▄▄▄█ █ ▀▀▄ ▀██▄█ █▄▄▄█ █
█▄▄▄▄▄▄▄█ ▀▄█▄█▄▀ █▄▄▄▄▄▄▄█
█ ▄▄▀█ ▄█ ▄█▄ █ ▀▄▄ ▄▄██  █
█▄▄▄▀▀▄▄▀█▄ ▀ ▄ ▄██▀▄█▄▄█▄█
███ █▄█▄█ ▄ ██▀  █  ███▀ ▀█
█▄▄██▀█▄█ ▄▀▄█▄    ▄█ ▄█▀▄█
█▄▄█▄█▄▄▄▀▀█▄ █ █ ▄▄▄  ▀█ █
█ ▄▄▄▄▄ █▀ ▀▀ ▄▄█ █▄█ ███▄█
█ █   █ ██▀▄█▄█ ▄▄▄▄   ▀ ██
█ █▄▄▄█ █ ▄█▄▄▄▄ ▀▀█ ▄██▄▄█
█▄▄▄▄▄▄▄█▄██▄██▄▄▄▄█▄▄███▄█

› Metro waiting on exp://192.168.1.19:19000
› Scan the QR code above with Expo Go (Android) or the Camera
app (iOS)

› Press a │ open Android
› Press w │ open web

› Press r │ reload app
› Press m │ toggle menu

› Press ? │ show all commands
Now it's time to put the Expo app to use! If you haven't installed it yet, install it on your phone - it's called Expo Go. If you're running it on an emulator, follow Expo's instructions for Xcode and Android Studio.
On your phone, scan the QR code. If you have an iOS device, use the Camera app, which will redirect you to Expo. If you're on Android, you can just open Expo > Scan QR code.
Whatever you do, you should get this if there are no errors:
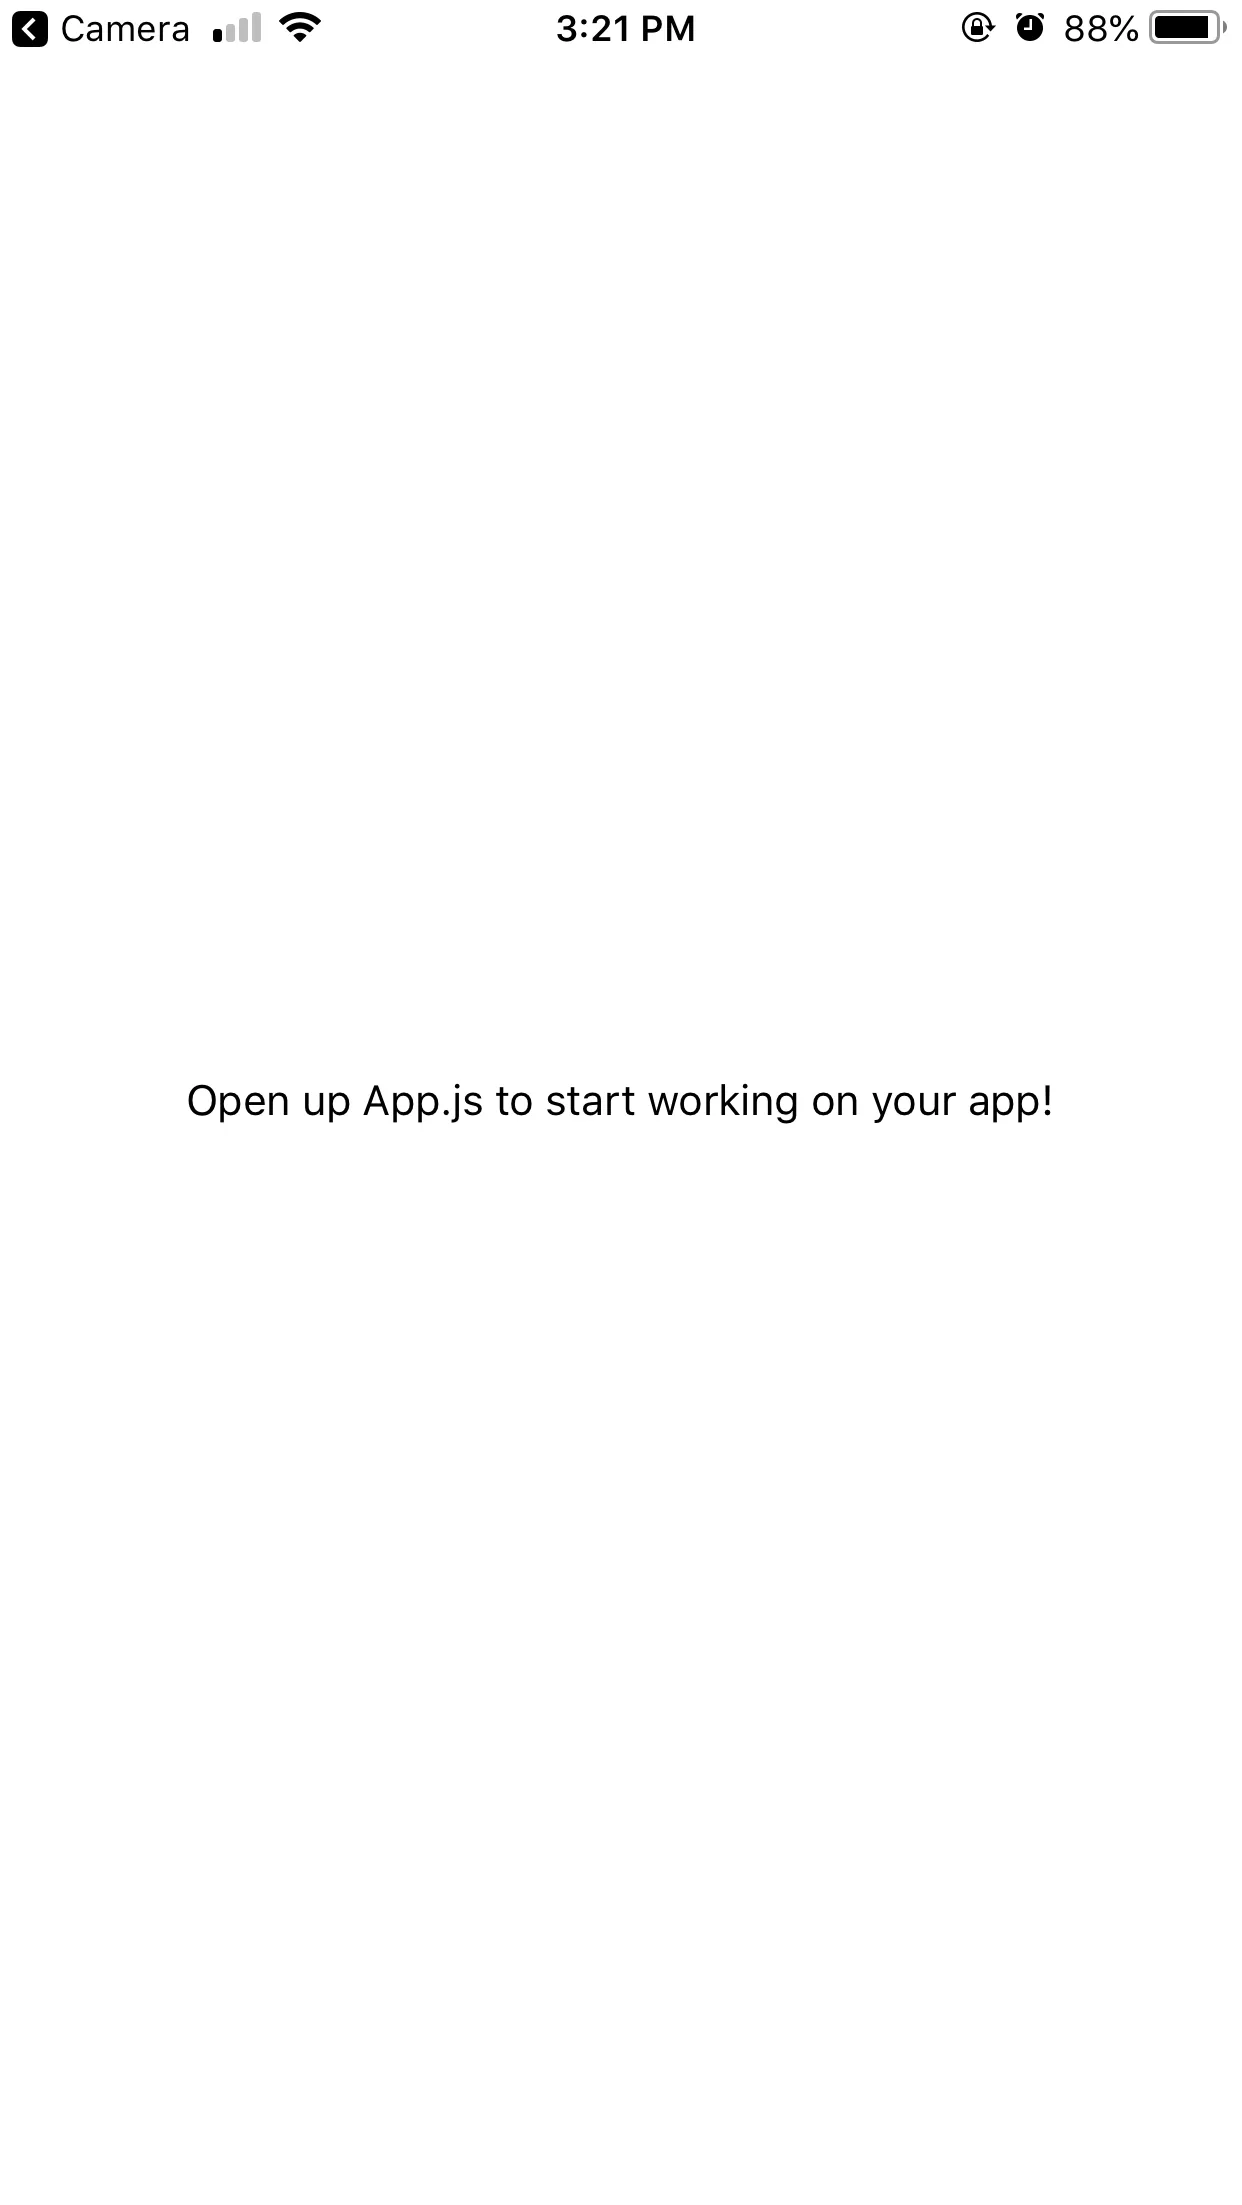 Hello, World! in React
Native
Hello, World! in React
Native
Cool!
Let's take a look at the folder structure in our project:
.
├── .expo
├── .expo-shared
├── .git
├── assets
├── node_modules
├── .gitignore
├── App.js
├── app.json
├── babel.config.js
├── package-lock.json
└── package.json
Ignoring the ones that are obvious (.git, node_modules, .gitignore, package-lock.json, and package.json), let's take a look at each of these files:
.expois a folder containing information specific to your machine, such as devices the app is running on.expo-sharedcontains files that do need to be shared with othersassetscontains any images you'll be using locally. Expo provides a few splash image placeholders that are also listed in.expo-shared.App.jsis the entry point of our app.App.jsoncontains metadata about our app - its app icon, its default orientation, etc.babel.config.jsis a transpiler.
Starting to code
Let's open up App.js now and take a look at it:
import { StatusBar } from "expo-status-bar";
import { StyleSheet, Text, View } from "react-native";

export default function App() {
    return (
        <View style={styles.container}>
            <Text>Open up App.js to start working on your app!</Text>
            <StatusBar style="auto" />
        </View>
    );
}

const styles = StyleSheet.create({
    container: {
        flex: 1,
        backgroundColor: "#fff",
        alignItems: "center",
        justifyContent: "center"
    }
});
Upon first glance, this looks like typical React code. After all, we are exporting a component that contains what is essentially React. However, upon a closer look, we can see a couple of differences. One, we are using the View and Text components, imported directly from the react-native library. Two, we are using what's known as an inline stylesheet, also provided by React Native. expo is also providing a status bar, which you can go ahead and remove.
Let's take a look at what React Native is giving us.
React Native components
You know how in HTML we have h1, h2, h3, etc.? Obviously, this isn't a web application, so we won't have access to those. Instead, we have access to the components that React Native gives us. When compiling, these components will be transformed into native code. This means that there are a couple of requirements:
- Everything has to be wrapped in a
Viewcomponent. According to React Native:
The most fundamental component for building a UI,
Viewis a container that supports layout with flexbox, style, some touch handling, and accessibility controls.Viewmaps directly to the native view equivalent on whatever platform React Native is running on...
- All text has to be wrapped in a
Textcomponent.
Other than that, you have a lot of flexibility! Say we write our own "Hello, World!" application. Remove everything in App.js, and let us start with a blank slate:
export default function App() {
    return;
}
Let's start by adding our View and Text tags:
import { Text, View } from "react-native";

export default function App() {
    return (
        <View>
            <Text>Hello, World!</Text>
        </View>
    );
}
This is what you'll get:
 Hello, World! is overlapping with the status
bar
Hello, World! is overlapping with the status
bar
Yep, that's right. The text is a bit weird. This is because of the status bar. We can fix that easily, actually. How about using React Native's SafeAreaView? As its name states, it creates a safer view. Replace View with SafeAreaView, and the text will be below the status bar, where you might expect it to be.
Well, at least on iOS devices, since SafeAreaView only supports iOS devices. No worries though - we can write our own for Android, using inline stylesheets, combined with some components that React Native provides us:
import {
    Platform,
    SafeAreaView,
    StatusBar,
    StyleSheet,
    Text,
    View
} from "react-native";

const styles = StyleSheet.create({
    AndroidSafeView: {
        paddingTop: Platform.OS === "android" ? StatusBar.currentHeight : 0
    }
});

export default function App() {
    return (
        <SafeAreaView style={styles.AndroidSafeView}>
            <Text>Hello, World!</Text>
        </SafeAreaView>
    );
}
Now when you run it on an Android phone, the text should no longer overlap! Nice.
Here, we're making use of a bunch of components that React Native gives us: Platform, to determine the operating system that we're running on; StatusBar, to determine the current height of our status bar; and of course, StyleSheet to add styles.
We can do all sorts of cool things. Let's start building our Pokedex by building one of these cards:
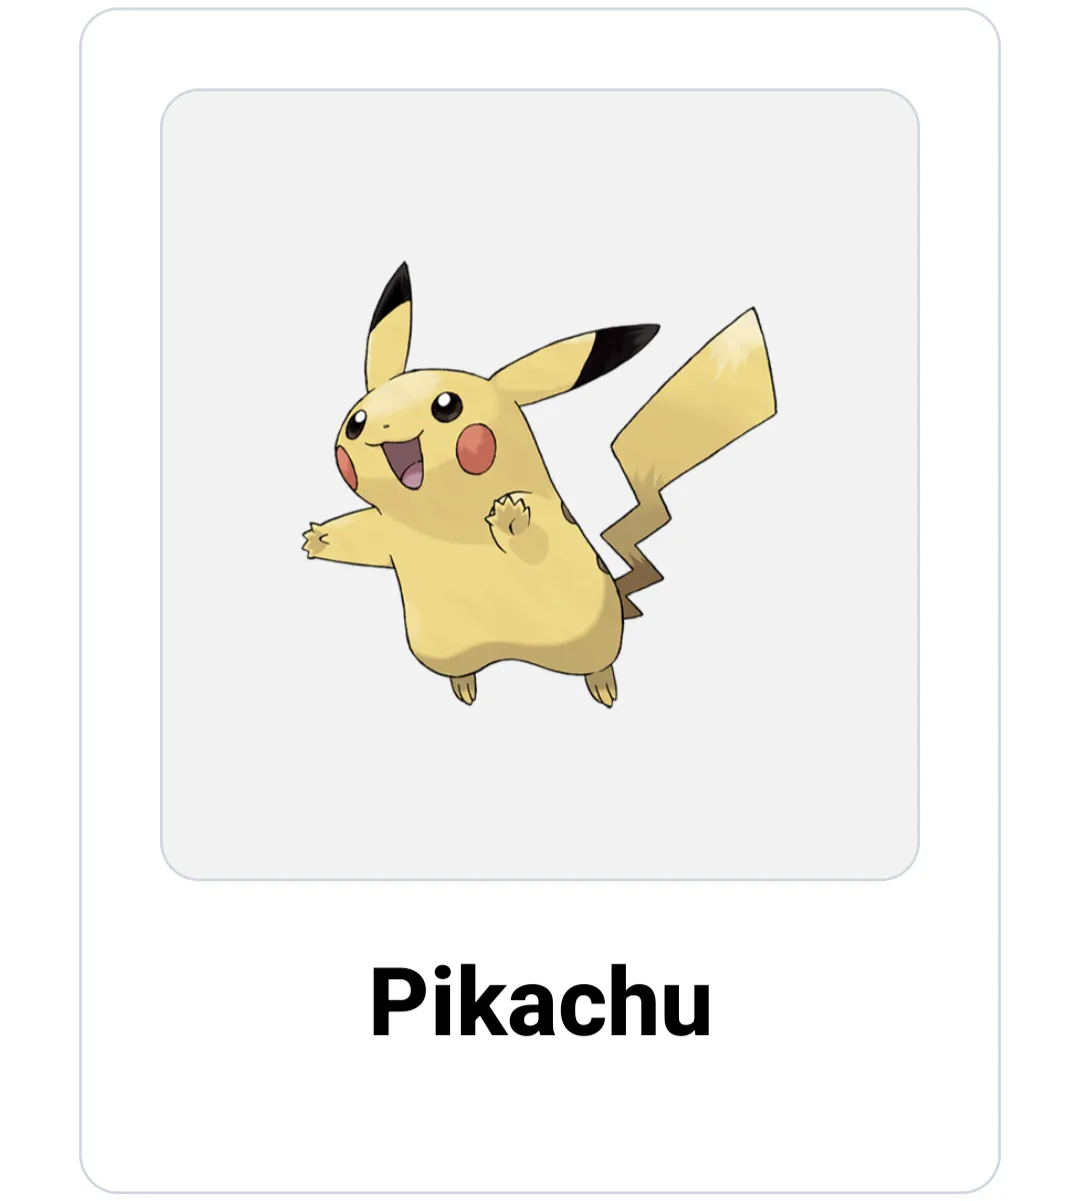 Pikachu card
Styling our preview cards
Okay, let's start by creating a React component. We can store it in a separate file (similar to React!) inside components/PreviewCard.js:
import { Image, StyleSheet, Text, View } from "react-native";

export default function PreviewCard({ name, image }) {
    return;
}
You can keep App.js the same, just remove the Text component.
Alright, back to components/PreviewCard.js. We're doing something cool here - we're using props similar to React - we're destructuring them as { name, image }. Every card is a View containing an image and a name, right? Well, the final card might look something like this:
import { Image, StyleSheet, Text, View } from "react-native";

const styles = StyleSheet.create({
    card: {
        borderWidth: 1,
        borderColor: "#cbd5e0",
        borderRadius: 15,
        marginHorizontal: 30,
        marginBottom: 15,
        padding: 30
    },
    image: {
        backgroundColor: "#F2F2F2",
        borderColor: "#cbd5e0",
        borderRadius: 15,
        borderWidth: 1,
        paddingHorizontal: 30,
        paddingVertical: 50
    },
    title: {
        fontSize: 36,
        fontWeight: "800",
        marginVertical: 20,
        textAlign: "center",
        textTransform: "capitalize"
    }
});

export default function PreviewCard({ name, image }) {
    return (
        <View style={styles.card}>
            {image ? (
                <View style={styles.image}>
                    <Image
                        source={{
                            uri: image,
                            width: 200,
                            height: 200
                        }}
                        style={{ alignSelf: "center" }}
                    />
                </View>
            ) : (
                <Text>No image available.</Text>
            )}
            <Text style={styles.title}>{name}</Text>
        </View>
    );
}
Type this in! Hopefully, you're already getting the hang of writing an app in React Native - it's basically the same as writing React! Well, let's take a look at this. First up, we're importing a couple of components from react-native. Then, we create an inline stylesheet containing the keys card, image, and title. These are analogous to CSS classes. Later on, we use these styles in our components. One of the neat things we've done is use a ternary operator. If there is an image provided, we'll use the URI provided inside an Image component, which needs to have the following props provided to it: uri, the location of the image; width; and height.
If there isn't an image, we just have a Text component telling us that there is no image available. You've most likely seen this ternary operator pattern before.
You may also notice style={{ alignSelf: "center" }} inside the Image component. In addition to inline stylesheets, we can use inline styling, which is something you've probably seen before if you've used NextJS or a CSS-in-JS library like theme-ui, for example.
Of course, the last thing to make this actually work is to use the PreviewCard component inside App.js:
import {
    Platform,
    SafeAreaView,
    StatusBar,
    StyleSheet,
    Text,
    View
} from "react-native";
import PreviewCard from "./components/PreviewCard";

const styles = StyleSheet.create({
    AndroidSafeView: {
        paddingTop: Platform.OS === "android" ? StatusBar.currentHeight : 0
    }
});

export default function App() {
    return (
        <SafeAreaView style={styles.AndroidSafeView}>
            <PreviewCard
                image="https://raw.githubusercontent.com/PokeAPI/sprites/master/sprites/pokemon/other/official-artwork/25.png"
                name="Pikachu"
            />
        </SafeAreaView>
    );
}
Now is the time to refresh your Expo app to see your updated changes, if it hasn't done so already. There are two ways you can go about doing this. One is to just type r in the command line where you're running npm start - this is a shortcut for reloading. You can also shake your phone if you have a physical phone, which should open up a menu where you can choose to reload the app.
Here's what you should have now:
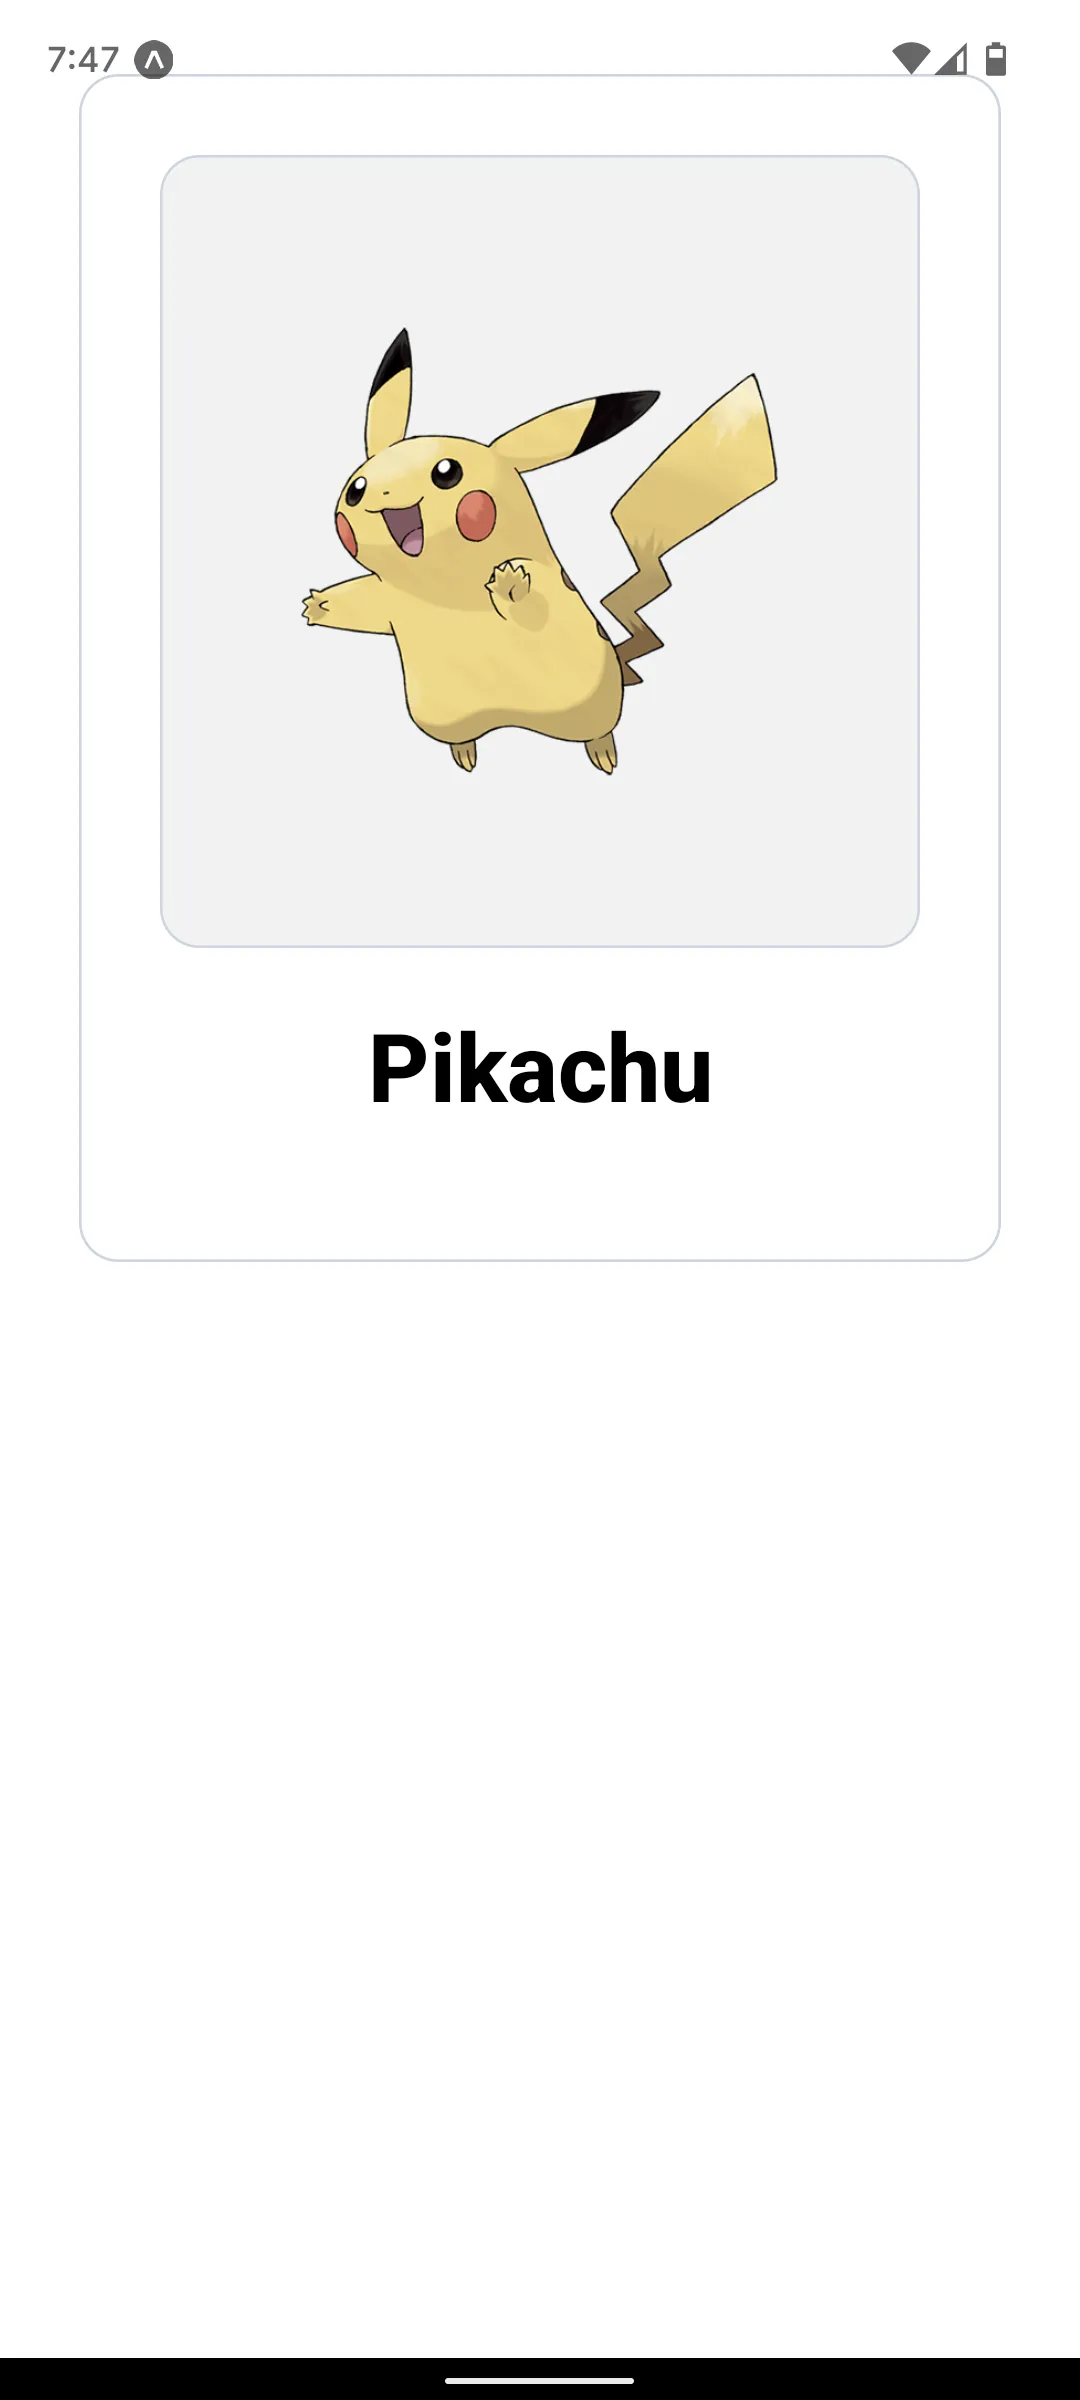 A Pikachu preview
card
A Pikachu preview
card
Let's fix that top padding by adding a View around our app contents inside App.js:
<SafeAreaView style={styles.AndroidSafeView}>
    <View style={{ paddingTop: 30 }}>
        <PreviewCard
            image="https://raw.githubusercontent.com/PokeAPI/sprites/master/sprites/pokemon/other/official-artwork/25.png"
            name="Pikachu"
        />
    </View>
</SafeAreaView>
We're ready for another challenge. How about using PokeAPI to generate a list of random Pokemon preview cards?
Random Pokemon preview cards
This part should be relatively easy. Let's write an asynchronous function inside our App component to generate some random Pokemon:
const fetchPokemonDetails = async (url, tryNum = 0) => {
    if (tryNum > 5) return; // Give it five tries max

    const randomPokemonReq = await fetch(url);

    const text = await randomPokemonReq.text();
    if (text.includes("Not Found"))
        return await fetchPokemonDetails(url, tryNum + 1);

    const randomPokemon = JSON.parse(text);
    const {
        name,
        id,
        sprites: {
            other: {
                "official-artwork": { front_default: image }
            }
        }
    } = randomPokemon;

    return { name, id, image };
};
All we're doing is creating a function called fetchPokemonDetails that will try five times to get a random Pokemon from a url argument. If it doesn't exist, we'll try again until we've done it five times. If we do get it, we'll destructure the results after passing it through JSON.parse to get the Pokemon's name, ID, and an image we can use. (If you look at the results of calling the API, you get a bunch of sprite images. In our case, we will be using sprites.other["official-artwork"].) Then we return those.
Now, some Pokemon have names that are made up of two or more words. For example, https://pokeapi.co/api/v2/pokemon/10148 returns the name "pikachu-partner-cap". We want something like "Pikachu (Partner Cap)". Let's switch out return { name, id, image }; with return { name: format(name), id, image }; and write a function inside App.js that will format these names for us:
const format = name => {
    // Format names given by PokeAPI (typically in format One-Two-Three)
    if (name.includes("-")) {
        const nameArray = name.split("-");
        return `${nameArray[0]} (${nameArray.slice(1).join(" ")})`;
    }

    return name;
};
To use these functions, we're going to have to use some React hooks - useState and useEffect. Let's import these quickly:
import { useState, useEffect } from "react";
// ...
Okay, let's set up an array with useState:
const [pokemonPreviewList, setPokemonPreviewList] = useState([]);
And now, we can populate this with an useEffect hook that is the equivalent of componentDidMount:
useEffect(() => {
    // Let's start by generating a random list of Pokemon!
    const generateRandomPokemonList = async () => {
        const req = await fetch("https://pokeapi.co/api/v2/pokemon?limit=-1");
        const data = await req.json();

        const range = data.count - 2; // -1 returns one less result than normal, so -2 is used instead of -1
        let chosenIds = [];
        let promises = [];
        for (let i = 0; i < 10; i++) {
            // Generate a random ID between 1 and the total number of Pokemon that hasn't been chosen yet
            let randomNumber = Math.floor(Math.random() * range);
            while (chosenIds.includes(randomNumber))
                randomNumber = Math.floor(Math.random() * range);
            chosenIds.push(randomNumber);

            promises.push(fetchPokemonDetails(data.results[randomNumber].url));
        }

        let chosenPokemon = await Promise.all(promises);

        // Filter empty results
        chosenPokemon = chosenPokemon.filter(pokemon => pokemon);
        setPokemonPreviewList(chosenPokemon);
    };

    generateRandomPokemonList();
}, []);
Here we're finally making use of the endpoint that returns all the Pokemon. We use Math.random to get 10 random Pokemon from the resulting JSON, making sure that they're unique. We add the resulting Promises from calling fetchPokemonDetails to an array, call Promise.all on that array to get the results, and update pokemonPreviewList with the resulting Pokemon - after filtering out any ones that didn't load correctly, of course.
Let's put this to use now. We can use another component that React Native provides, FlatList. FlatList allows us to render our child components lazily, which is pretty nice. Here's how that might look:
import {
    FlatList,
    Platform,
    SafeAreaView,
    StatusBar,
    StyleSheet,
    Text,
    View
} from "react-native";
// ...

export default function App() {
    // ...
    return (
        <SafeAreaView style={styles.AndroidSafeView}>
            <View style={{ paddingTop: 30 }}>
                <FlatList
                    data={pokemonPreviewList}
                    keyExtractor={item => item.id}
                    renderItem={({ item }) => <PreviewCard {...item} />}
                    contentContainerStyle={{
                        paddingTop: 30,
                        paddingBottom: 60
                    }}
                />
            </View>
        </SafeAreaView>
    );
}
Sidenote: Check out the React Native documentation! All the React documentation is so accessible and easy to read, and you'll definitely find it useful.
FlatList, like the other list components that React Native provides (SectionList), takes the props:
data, which is just the data to loop overkeyExtractor, which is just a function that lets React know what key to mark each child component (i.e., when you usemapin normal React, it warns you if you don't have unique keys for each child component)renderItem, which describes the function to apply to render each child component (i.e., this is themapfunction)
We're also using the option contentContainerStyle, which is the equivalent of using inline styling, but for React Native lists.
There's one last thing to do. Since we are using an asynchronous function, we also have to account for when there aren't any items yet. In such a situation, we could show a loading screen, for example. React Native gives us nice progress indicators (the spinners you see on iOS and Android) to indicate that something is loading, through ActivityIndicator. Let's combine that with a ternary operator:
import {
    ActivityIndicator,
    FlatList,
    Platform,
    SafeAreaView,
    StatusBar,
    StyleSheet,
    Text,
    View
} from "react-native";
// ...

export default function App() {
    // ...
    return (
        <SafeAreaView style={styles.AndroidSafeView}>
            <View style={{ paddingTop: 30 }}>
                {pokemonPreviewList.length > 0 ? (
                    <FlatList
                        data={pokemonPreviewList}
                        keyExtractor={item => item.id}
                        renderItem={({ item }) => <PreviewCard {...item} />}
                        contentContainerStyle={{
                            paddingTop: 30,
                            paddingBottom: 60
                        }}
                    />
                ) : (
                    <View
                        style={{
                            flex: 1,
                            justifyContent: "center",
                            alignItems: "center"
                        }}>
                        <Text style={{ fontSize: 24 }}>Loading...</Text>
                        <ActivityIndicator
                            size="large"
                            style={{ marginTop: 20 }}
                        />
                    </View>
                )}
            </View>
        </SafeAreaView>
    );
}
Nothing special here. We've just added a View with inline styling containing an ActivityIndicator, which upon taking a look at the React Native website, contains a size prop.
Now when you refresh your Expo app, you'll see ten preview cards! Refresh it another time, and you'll see ten more.
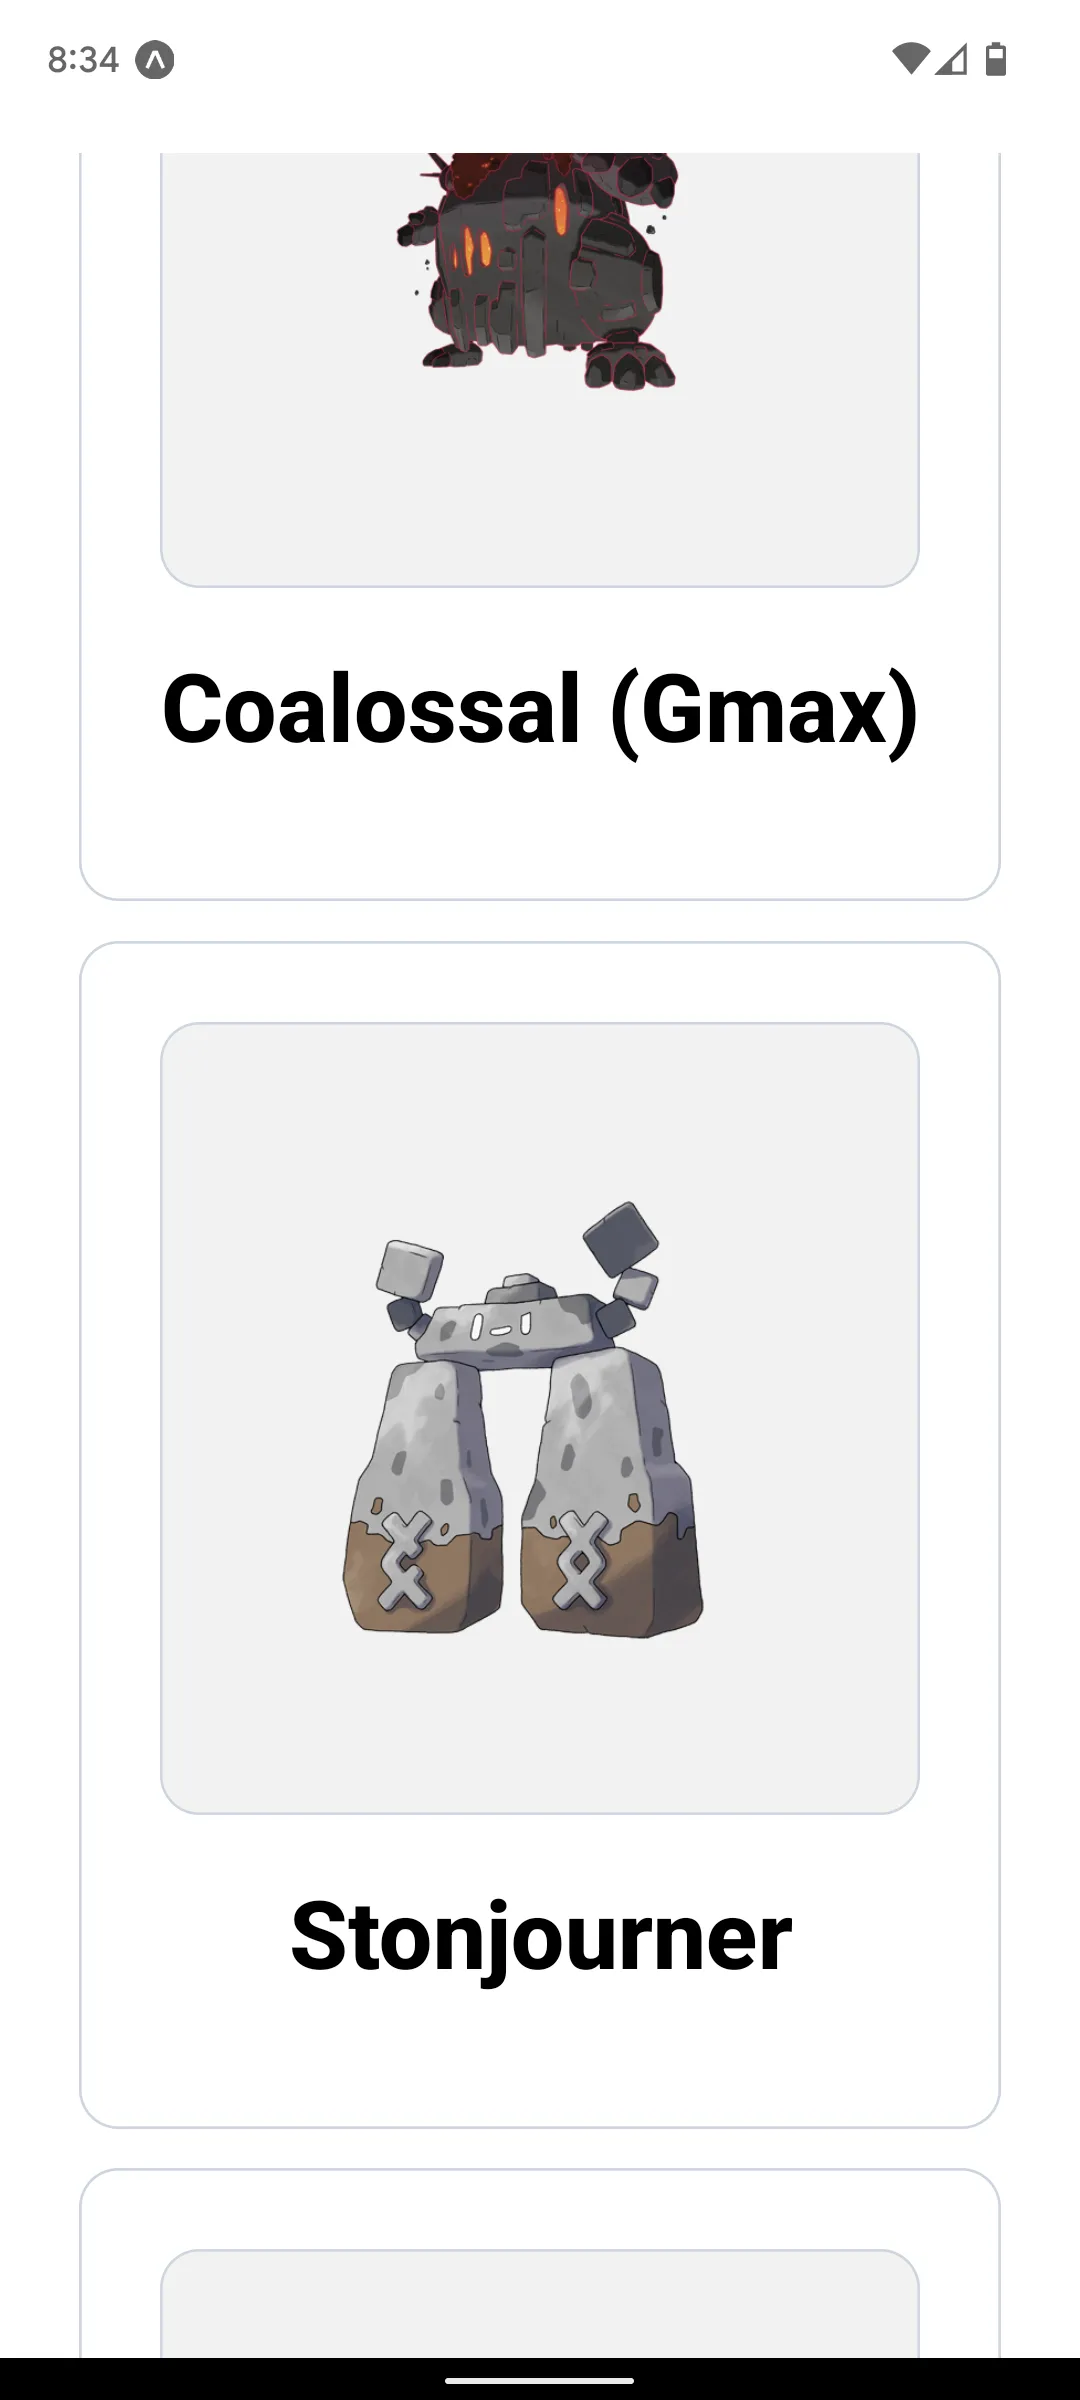 Ten new cards each
time
Ten new cards each
time
Holy fork, that's so cool! This is pretty much the code inside the branch milestone-1-preview-cards. In other words, we're past our first milestone, whoo! The last thing we need to do is move some of the styles inside components/PreviewCard.js to a separate file - components/cardStyles.js - for use later in other components. Here's what you'll need to move to components/cardStyles.js:
import { StyleSheet } from "react-native";

export default StyleSheet.create({
    image: {
        backgroundColor: "#F2F2F2",
        borderColor: "#cbd5e0",
        borderRadius: 15,
        borderWidth: 1,
        paddingHorizontal: 30,
        paddingVertical: 50
    },
    title: {
        fontSize: 36,
        fontWeight: "800",
        marginVertical: 20,
        textAlign: "center",
        textTransform: "capitalize"
    }
});
Then, inside components/PreviewCard.js, you'll also need to import ./cardStyles and use cardStyles.image and cardStyles.title. Here's how components/PreviewCard.js will end up looking like:
import { Image, StyleSheet, Text, View } from "react-native";
import cardStyles from "./cardStyles";

const styles = StyleSheet.create({
    card: {
        borderWidth: 1,
        borderColor: "#cbd5e0",
        borderRadius: 15,
        marginHorizontal: 30,
        marginBottom: 15,
        padding: 30
    }
});

export default function PreviewCard({ name, image }) {
    return (
        <View style={styles.card}>
            {image ? (
                <View style={cardStyles.image}>
                    <Image
                        source={{
                            uri: image,
                            width: 200,
                            height: 200
                        }}
                        style={{ alignSelf: "center" }}
                    />
                </View>
            ) : (
                <Text>No image available.</Text>
            )}
            <Text style={cardStyles.title}>{name}</Text>
        </View>
    );
}
Alrighty, what's next? Well, it's time to build some search functionality!
Adding search functionality
Before we add search functionality, we're going to need to have a list of Pokemon to search. While this isn't the most efficient method, we'll just store the list of Pokemon inside our state, during useEffect:
// ...
export default function App() {
    // ...
    const [pokemonList, setPokemonList] = useState([]);

    useEffect(() => {
        const processListForSearch = async mainList => {
            const pokemonList = mainList.map(pokemon => ({
                name: format(pokemon.name),
                url: pokemon.url
            }));

            setPokemonList(pokemonList);
        };

        const generateRandomPokemonList = async () => {
            const req = await fetch(
                "https://pokeapi.co/api/v2/pokemon?limit=-1"
            );
            const data = await req.json();

            // Save this data for search later on
            processListForSearch(data.results);

            // ...
        };

        generateRandomPokemonList();
    }, []);
    // ...
}
We're basically adding another nested function inside useEffect, processListForSearch, that will process the results of querying https://pokeapi.co/api/v2/pokemon?limit=-1 (which returns the entire list of Pokemon, if you don't remember). We'll store each Pokemon's name and URL, for our search.
To add search functionality, we're going to be using another React Native component, TextInput, which obviously allows us to take in text input. We're also going to make use of the Button component, which the user will click on to search for a Pokemon. The resulting JSX looks something like this:
import {
    ActivityIndicator,
    Button,
    FlatList,
    Platform,
    SafeAreaView,
    StatusBar,
    StyleSheet,
    Text,
    TextInput,
    View
} from "react-native";
// ...

const styles = StyleSheet.create({
    AndroidSafeView: {
        paddingTop: Platform.OS === "android" ? StatusBar.currentHeight : 0
    },
    input: {
        borderBottomWidth: 1,
        borderColor: "#cbd5e0",
        flexDirection: "row",
        justifyContent: "space-between",
        paddingHorizontal: 20,
        paddingVertical: 10
    }
});

export default function App() {
    // ...
    return (
        <SafeAreaView style={styles.AndroidSafeView}>
            <View>
                <View style={styles.input}>
                    <TextInput
                        autoCorrect={false}
                        placeholder="Search for a Pokemon!"
                        style={{ fontSize: 18, flex: 1 }}
                    />
                    <Button title="Search" />
                </View>
                <View style={{ paddingBottom: 120 }}>
                    {pokemonPreviewList.length > 0 ? (
                        <FlatList
                            data={pokemonPreviewList}
                            keyExtractor={item => item.id}
                            renderItem={({ item }) => <PreviewCard {...item} />}
                            contentContainerStyle={{
                                paddingTop: 30,
                                paddingBottom: 60
                            }}
                        />
                    ) : (
                        <View
                            style={{
                                flex: 1,
                                justifyContent: "center",
                                alignItems: "center"
                            }}>
                            <Text style={{ fontSize: 24 }}>Loading...</Text>
                            <ActivityIndicator
                                size="large"
                                style={{ marginTop: 20 }}
                            />
                        </View>
                    )}
                </View>
            </View>
        </SafeAreaView>
    );
}
Okay, let's slow down for a moment. First of all, notice how we've updated styles with another "class": input, which contains the styles for our input container. This is used in one of the Views nested inside our SafeAreaView.
We've also rearranged the JSX, so take note of that. We have an extra View container serving as a flex container that holds our TextInput and Button side by side. You'll notice that these components have props similar to an <input> or a <button> being used in normal React - for example, we can have an autoCorrect prop, we can have a placeholder prop, and so on.
How might we go about taking in input? You guessed right - we can do the same thing we typically do in React - we can assign a state value:
const [searchInput, setSearchInput] = useState("");
Now we can go ahead and update our TextInput:
<TextInput
    autoCorrect={false}
    onChangeText={setSearchInput}
    placeholder="Search for a Pokemon!"
    style={{ fontSize: 18, flex: 1 }}
    value={searchInput}
/>
Instead of onChange, React Native has us use onChangeText. Now that we have the input, we can actually use it. That means we're testing for when the user clicks the button. Instead of using onClick, React Native uses onPress:
<Button title="Search" onPress={search} />
Of course, we haven't written the search function yet, so let's go ahead and do that right now:
// ...
export default function App() {
    // ...
    const search = async () => {
        // Apply basic fuzzy search
        const input = searchInput.toLowerCase().trim();
        const results = pokemonList.filter(pokemon =>
            pokemon.name.startsWith(input)
        );
        if (!results.length) {
            setPokemonPreviewList([]);
            return;
        }

        let promises = [];
        for (let result of results) {
            promises.push(fetchPokemonDetails(result.url, 0));
        }
        let chosenPokemon = await Promise.all(promises);
        setPokemonPreviewList(chosenPokemon);
    };
    // ...
}
Once again, extremely basic for the purpose of this workshop. We are just filtering through pokemonList for any Pokemon that might start with the given input. If we don't find any, we'll clear pokemonPreviewList, to clear previous search input (or the first round of random Pokemon). If we do, we'll use promises to fetch the details of each Pokemon, and then update pokemonPreviewList with that.
Now the code should work. However, if you type in the name of a Pokemon that doesn't exist, you'll get nothing - no preview cards - which can be kind of confusing. Let's use a nested ternary operator to deal with that:
// ...
export default function App() {
    // ...
    return (
        <SafeAreaView style={styles.AndroidSafeView}>
            <View>
                <View style={styles.input}>
                    <TextInput
                        autoCorrect={false}
                        onChangeText={setSearchInput}
                        placeholder="Search for a Pokemon!"
                        style={{ fontSize: 18, flex: 1 }}
                        value={searchInput}
                    />
                    <Button title="Search" onPress={search} />
                </View>
                <View style={{ paddingBottom: 120 }}>
                    {pokemonPreviewList.length > 0 ? (
                        <FlatList
                            data={pokemonPreviewList}
                            keyExtractor={item => item.id}
                            renderItem={({ item }) => <PreviewCard {...item} />}
                            contentContainerStyle={{
                                paddingTop: 30,
                                paddingBottom: 60
                            }}
                        />
                    ) : searchInput.length > 0 ? (
                        <View
                            style={{
                                flex: 1,
                                justifyContent: "center",
                                alignItems: "center"
                            }}>
                            <Text style={{ fontSize: 24 }}>
                                Couldn't find a matching Pokemon!
                            </Text>
                        </View>
                    ) : (
                        <View
                            style={{
                                flex: 1,
                                justifyContent: "center",
                                alignItems: "center"
                            }}>
                            <Text style={{ fontSize: 24 }}>Loading...</Text>
                            <ActivityIndicator
                                size="large"
                                style={{ marginTop: 20 }}
                            />
                        </View>
                    )}
                </View>
            </View>
        </SafeAreaView>
    );
}
And now the search functionality should work beautifully:
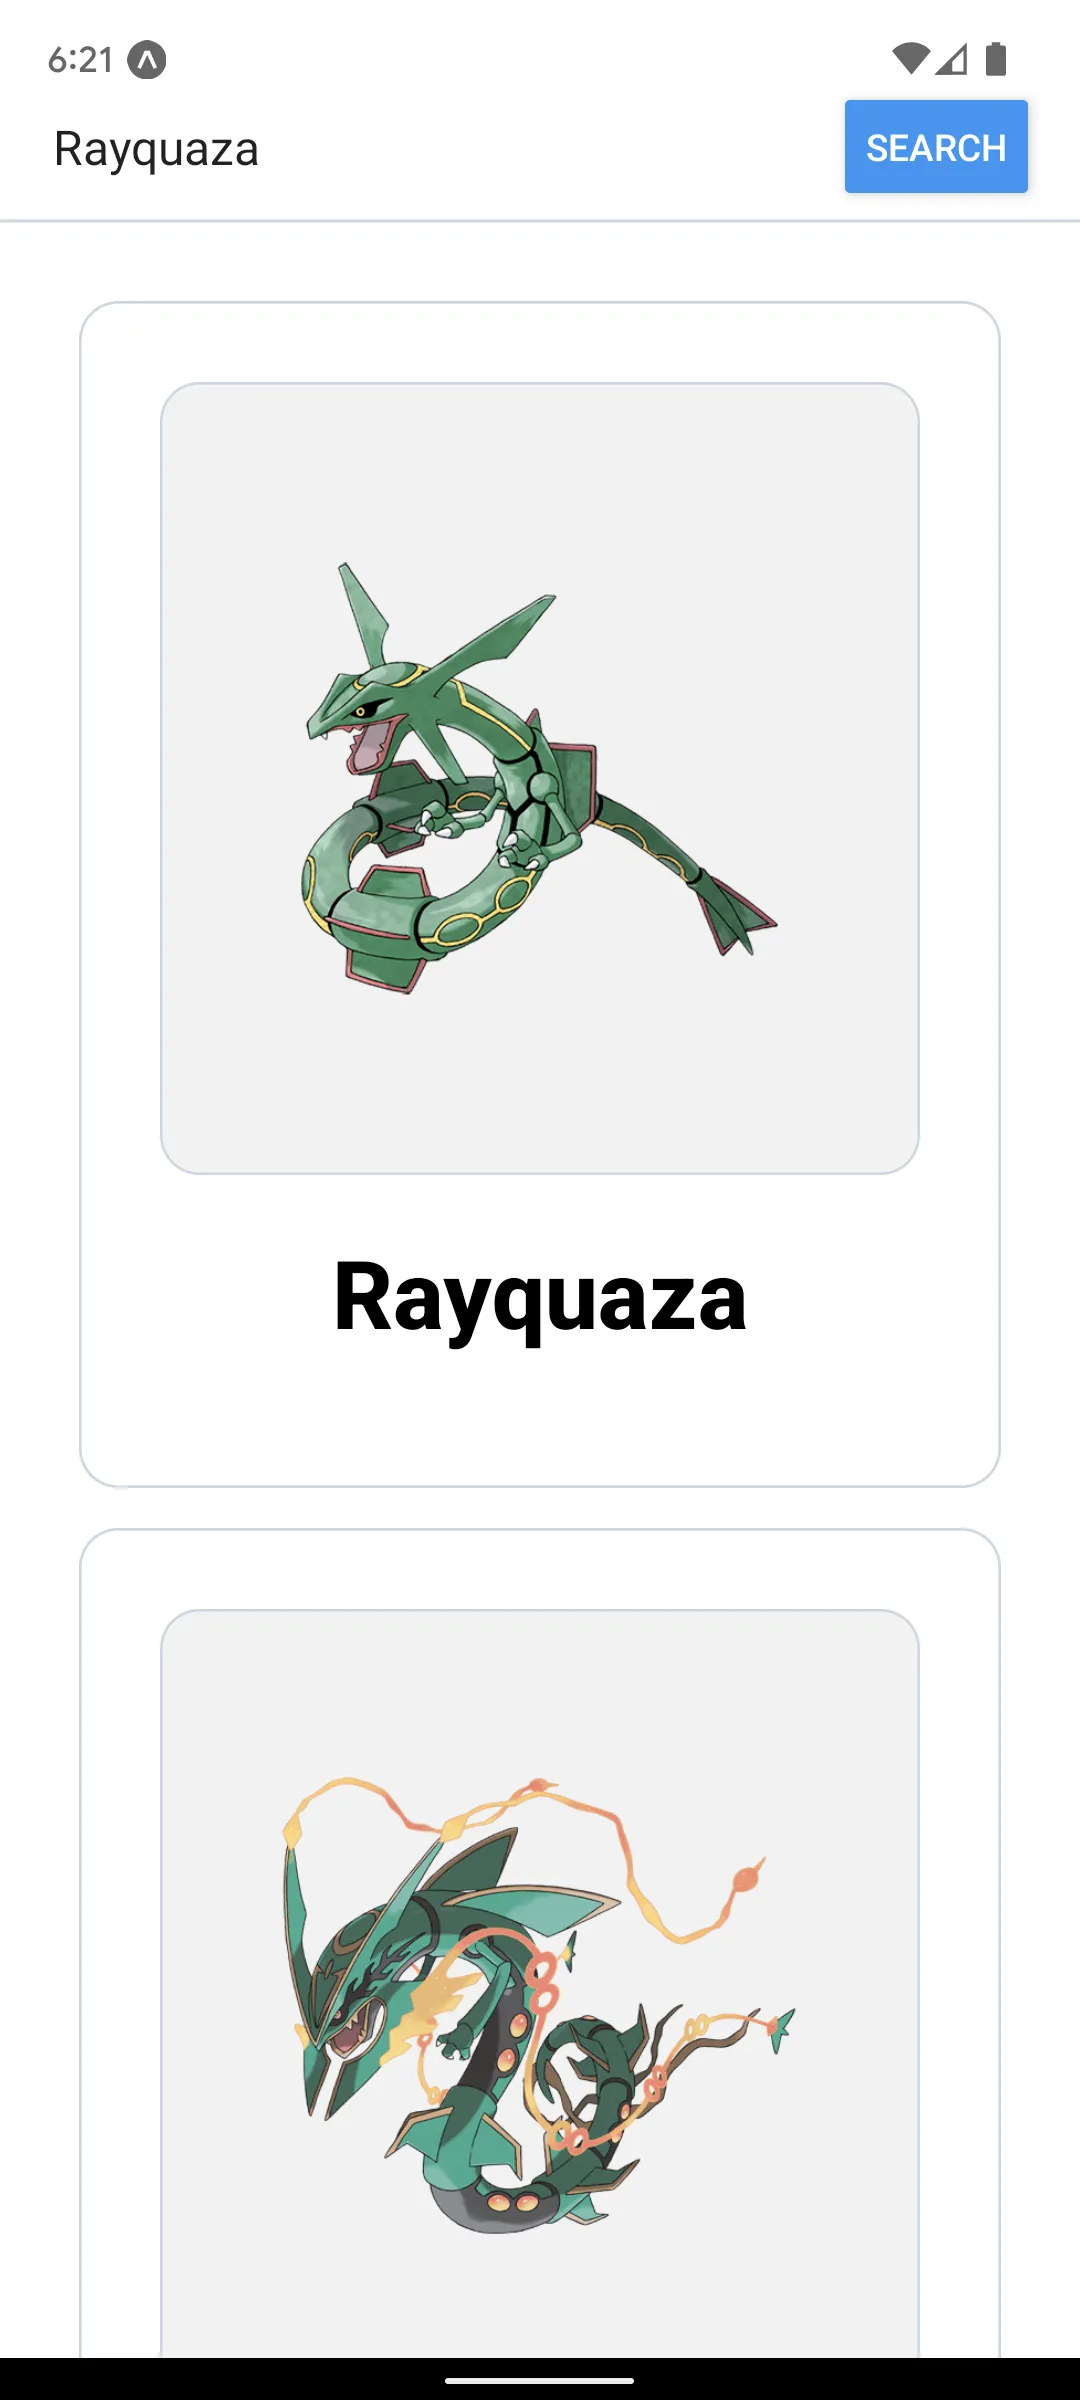 Searching up Rayquaza to demonstrate search
functionality
Searching up Rayquaza to demonstrate search
functionality
That's it for milestone-2-search-functionality! We've passed the second milestone. The next step for us is to add navigation.
Adding navigation
Okay, now it's time to add some navigation. There are actually different kinds, of course, such as drawer navigation (the menu opening from the left), tab navigation (bottom tab menu). We're going to be using stack navigation. A stack is a data structure where items are added to the end and items get pushed out first at the end as well. Our app will work similarly:
- When we click on a Pokemon preview card, the info page for that Pokemon will be added to the top of the stack.
- When we click the back button, the info page for that Pokemon will be removed from the top of the stack, thus returning us to our previous Pokemon preview page.
- Later on in the final milestone, we're also going to add a third page - a "My Pokemon" page.
Now, React Native doesn't come with navigation by itself. Just like there's an ecosystem of packages around the React framework, there's a bunch of packages built on top of React Native. The one we'll be using for React Native is React Navigation, which was also built by Expo! They provide a bunch of different options - they even allow you to create a custom navigator - but we'll focus on stack navigation.
Start by installing the necessary dependencies:
npx expo install react-native-screens react-native-safe-area-context
npm i @react-navigation/native @react-navigation/stack
Okay, now we're ready to add navigation to our code! First up, we have to set up a navigation container that will hold all our pages. If you've used something like react-router, this should be familiar. We should store our pages as separate components to make App.js easier to work with. Let's move the current app into a component we'll place inside screens/Home.js:
// screens/Home.js - Copy + paste all of App.js in here
// ...
export default function Home() {
    // ...
}
Now, we can go inside App.js, remove the unnecessary imports, and then add the navigation container. Here's how App.js will end up looking like:
import { NavigationContainer } from "@react-navigation/native";
import { createStackNavigator } from "@react-navigation/stack";
import { Text, TouchableOpacity } from "react-native";
import Home from "./screens/Home";

const Stack = createStackNavigator();

export default function App() {
    return (
        <NavigationContainer>
            <Stack.Navigator initialRouteName="Home">
                <Stack.Screen
                    name="Home"
                    component={Home}
                    options={({ navigation }) => ({
                        headerRight: () => (
                            <TouchableOpacity
                                onPress={() => console.log("TODO")}
                                style={{ marginRight: 15 }}>
                                <Text
                                    style={{
                                        color: "#007aff",
                                        fontSize: 17,
                                        letterSpacing: 0.35
                                    }}>
                                    My Pokemon
                                </Text>
                            </TouchableOpacity>
                        )
                    })}
                />
            </Stack.Navigator>
        </NavigationContainer>
    );
}
This might be a bit overwhelming, so let's take it slow! The first thing we're doing is importing what we need - NavigationContainer to hold the stack navigator, and createStackNavigator to actually create a stack navigator and store it inside Stack.
Then, in our JSX, we start by wrapping everything in NavigationContainer and Stack.Navigator. Notice how we've passed the prop initialRouteName to Stack.Navigator with the value of "Home". This actually refers to the initial screen to show, based on the name of the screen.
We've created this initial screen using Stack.Screen. It has, of course, the value of "Home", and is passed the component Home. We're also using the prop options - this determines the content of the top header bar.
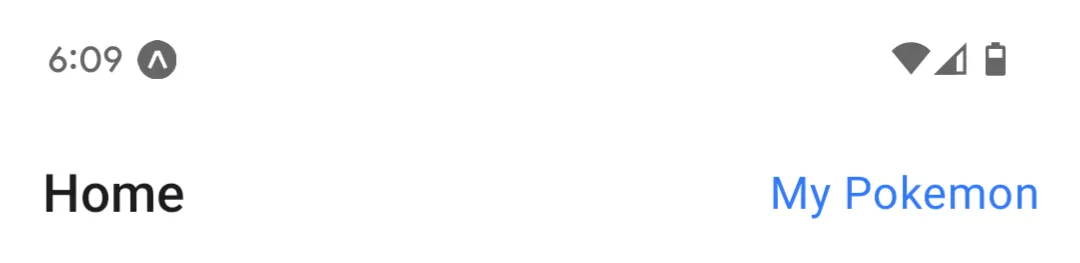 Top bar has the name of the current screen and a "My Pokemon"
link/button
Top bar has the name of the current screen and a "My Pokemon"
link/button
See the "My Pokemon" in the top right corner? We're doing that inside the options prop, where we're returning JSX that uses React Native's TouchableOpacity to create a clickable link that currently logs "TODO" when pressed. It's basically a Button, but without the styles of a button. Instead, it's a view that when pressed, changes opacity briefly. React Native has other Touchables, including TouchableHighlight (which we're just about to use) and TouchableWithoutFeedback, that you can learn more about by looking at the documentation.
Take your time and type this in! We just introduced a bunch of stuff, but it should be relatively familiar.
Of course, we're only adding stack navigation so we can have an info page for each of the Pokemon preview cards. Let's use TouchableHighlight to make each of our preview cards clickable inside components/PreviewCard.js:
import {
    Image,
    StyleSheet,
    Text,
    TouchableHighlight,
    View
} from "react-native";
import cardStyles from "./cardStyles";

// ...

export default function PreviewCard {
    return (
        <TouchableHighlight
            onPress={() => console.log("TODO")}
            underlayColor="white">
            <View style={styles.card}>
                {image ? (
                    <View style={cardStyles.image}>
                        <Image
                            source={{
                                uri: image,
                                width: 200,
                                height: 200
                            }}
                            style={{ alignSelf: "center" }}
                        />
                    </View>
                ) : (
                    <Text>No image available.</Text>
                )}
                <Text style={cardStyles.title}>{name}</Text>
            </View>
        </TouchableHighlight>
    );
}
TouchableHighlight is similar to TouchableOpacity, but instead of changing opacity when clicked on, it briefly lights up with the underlayColor. Other than the adding of TouchableHighlight, we haven't changed components/CardPreview.js in any other way.
Before we actually add logic to onPress, we should probably create an Info screen first to actually have a page to push to our stack navigator. Let's add screens/Info.js:
import { useState, useEffect } from "react";
import { Image, Text, ScrollView, StyleSheet, View } from "react-native";
import cardStyles from "../components/cardStyles";

const styles = StyleSheet.create({
    row: {
        borderBottomWidth: 1,
        borderBottomColor: "#cbd5e0",
        flexDirection: "row",
        justifyContent: "space-between",
        paddingVertical: 15
    }
});

export default function Info({ route }) {
    const { name, id, image } = route.params;
    const [weight, setWeight] = useState(0);
    const [height, setHeight] = useState(0);
    const [types, setTypes] = useState([]);
    const [stats, setStats] = useState([]);
    const [moves, setMoves] = useState([]);

    useEffect(() => {
        const loadInfo = async () => {
            // Load info about Pokemon from https://pokeapi.co/api/v2/pokemon/<id>
            const req = await fetch(`https://pokeapi.co/api/v2/pokemon/${id}`);
            const pokemon = await req.json();

            setWeight(pokemon.weight);
            setHeight(pokemon.height);
            setMoves(pokemon.moves.map(i => i.move.name));
            setTypes(pokemon.types.map(i => i.type.name));
            setStats(
                pokemon.stats.map(i => ({
                    name: i.stat.name,
                    value: i.base_stat
                }))
            );
        };

        loadInfo();
    }, []);

    return (
        <View>
            <ScrollView>
                {image ? (
                    <View style={[cardStyles.image, { borderRadius: 0 }]}>
                        <Image
                            source={{
                                uri: image,
                                width: 300,
                                height: 300
                            }}
                            style={{ alignSelf: "center" }}
                        />
                    </View>
                ) : (
                    <Text style={{ margin: 30 }}>No image available.</Text>
                )}
                <View style={{ padding: 30 }}>
                    <Text style={cardStyles.title}>{name}</Text>
                    <View style={styles.row}>
                        <Text style={{ fontSize: 18 }}>ID</Text>
                        <Text style={{ fontSize: 18 }}>{id}</Text>
                    </View>
                    <View style={styles.row}>
                        <Text style={{ fontSize: 18 }}>Weight</Text>
                        <Text style={{ fontSize: 18 }}>
                            {weight ? weight : "Loading"}
                        </Text>
                    </View>
                    <View style={styles.row}>
                        <Text style={{ fontSize: 18 }}>Height</Text>
                        <Text style={{ fontSize: 18 }}>
                            {height ? height : "Loading"}
                        </Text>
                    </View>
                    <View style={styles.row}>
                        <Text style={{ fontSize: 18 }}>Types</Text>
                        <Text
                            style={{
                                fontSize: 18,
                                textTransform: "capitalize"
                            }}>
                            {types ? types.join(", ") : "Loading"}
                        </Text>
                    </View>
                    {stats.map((stat, key) => (
                        <View key={key} style={styles.row}>
                            <Text
                                style={{
                                    fontSize: 18,
                                    textTransform: "capitalize"
                                }}>
                                {`Base ${stat.name.split("-").join(" ")}`}
                            </Text>
                            <Text style={{ fontSize: 18 }}>{stat.value}</Text>
                        </View>
                    ))}
                    <View style={[styles.row, { flexDirection: "column" }]}>
                        <Text style={{ fontSize: 18 }}>Moves</Text>
                        {moves.map((move, key) => (
                            <Text
                                key={key}
                                style={{
                                    marginTop: 10,
                                    marginLeft: 10,
                                    fontSize: 18,
                                    textTransform: "capitalize"
                                }}>
                                - {move.split("-").join(" ")}
                            </Text>
                        ))}
                    </View>
                </View>
            </ScrollView>
        </View>
    );
}
Now, this seems like a lot, but it builds on the concepts we've been learning about. First, we import the necessary dependencies, of course. Then, we create an inline stylesheet with the "class" row to style our rows of information similar to how you might see them in a table.
Inside our component, you may notice we are doing something new. We're destructuring our props as usual, but we've got a route prop. Where did that come from? Well, what react-navigation does is it passes the route prop to each "screen". This route prop will contain props passed from the previous page, in an object. Here, we're expecting the previous page (Home) to pass to us the name, ID, and image of the Pokemon in question.
This is useful because one, the name is already formatted, and two, we can use the ID to fetch more information about the Pokemon. In fact, that's exactly what we're doing. We have a couple of state values we're going to use to store this extra information:
weightheighttypes: What types the current Pokemon belong to, e.g. poison, grass, etc.stats: A list of stats for the Pokemon- Base HP value
- Base attack value
- Base defense value
- Base special attack value
- Base special defense value
- Base speed
moves: A list of moves for the Pokemon
Then, in our useEffect, we update these.
Down in our JSX, we're using a bunch of Views and Texts to render this information, using ternary operators to indicate information that's being loaded. A new component that we're using is ScrollView, which indicates a View that can be scrolled if necessary.
Another cool thing to note is that we're using style={[cardStyles.image, { borderRadius: 0 }]}. It turns out that you can use arrays to combine different styles, regardless of whether it's inline styling or from an inline stylesheet. For example, we could do something like style={[cardStyles.title, cardStyles.image]}, which would be completely valid.
Other than that, everything's been covered!
Now it's time to put that stack navigator to use. Let's replace that console.log("TODO") in components/PreviewCard.js. As mentioned before, react-navigation provides a route prop. Well, it turns out that they also provide a navigation prop! You can use it to push pages to the stack navigator.
However, react-navigation only passes it to screens created with Stack.Screen, so if we want to use the navigation prop, we're going to have to pass it through screens/Home.js:
// ...
export default function Home({ navigation }) {
    // ...
    return (
        // ...
        <FlatList
            data={pokemonPreviewList}
            keyExtractor={item => item.id}
            renderItem={({ item }) => (
                <PreviewCard {...item} navigation={navigation} />
            )}
            contentContainerStyle={{
                paddingTop: 30,
                paddingBottom: 30
            }}
        />
        // ...
    );
}
Let's add navigation to the destructured props in components/PreviewCard.js. We'll also add the id prop, which is already passed to the PreviewCard component so that we can use it later:
// ...
export default function PreviewCard({ name, id, image, navigation }) {
    // ...
}
And now we can replace the console.log("TODO") inside components/PreviewCard.js with this:
// navigation.navigate(screenName, props)
navigation.navigate("Info", { name, id, image });
Now you see where the parameters in route.params inside screens/Info.js are coming from! navigation.navigate, if it isn't obvious yet, takes the name of a screen and the props to pass to it, and pushes that screen to the top of the stack, thus taking us there.
We haven't actually used the Info screen with Stack.Screen, so none of this code would technically work. Let's do that now, shall we?
<Stack.Screen
    name="Info"
    component={Info}
    options={{
        headerRight: () => (
            <TouchableOpacity
                onPress={() => console.log("TODO")}
                style={{ marginRight: 15 }}>
                <Text
                    style={{
                        color: "#007aff",
                        fontSize: 17,
                        letterSpacing: 0.35
                    }}>
                    Add
                </Text>
            </TouchableOpacity>
        )
    }}
/>
This should go beneath the Home screen inside App.js. Instead of "My Pokemon", the text is "Add" instead.
Alright! Now the page functionality should be just about working. However, if you run this right now, you'll notice that everything has a gray background. Let's get rid of this grayish background, which react-navigation has added for us. We'll just create some new "classes" inside our inline stylesheets to take care of this by making the whole background white instead of the grayish color.
Here's screens/Home.js:
// ...

const styles = StyleSheet.create({
    container: { backgroundColor: "white", flex: 1 },
    input: {
        borderBottomWidth: 1,
        borderColor: "#cbd5e0",
        flexDirection: "row",
        justifyContent: "space-between",
        paddingHorizontal: 20,
        paddingVertical: 10
    }
});

export default function Home() {
    // ...
    return (
        <View style={styles.container}>
            { // ... }
        </View>
    );
}
Same thing inside screens/Info.js:
// ...

const styles = StyleSheet.create({
    container: { backgroundColor: "white", flex: 1 },
    row: {
        borderBottomWidth: 1,
        borderBottomColor: "#cbd5e0",
        flexDirection: "row",
        justifyContent: "space-between",
        paddingVertical: 15
    }
});

export default function Info() {
    // ...
    return (
        <View style={styles.container}>
            { // ... }
        </View>
    );
}
And now the stack navigation works!
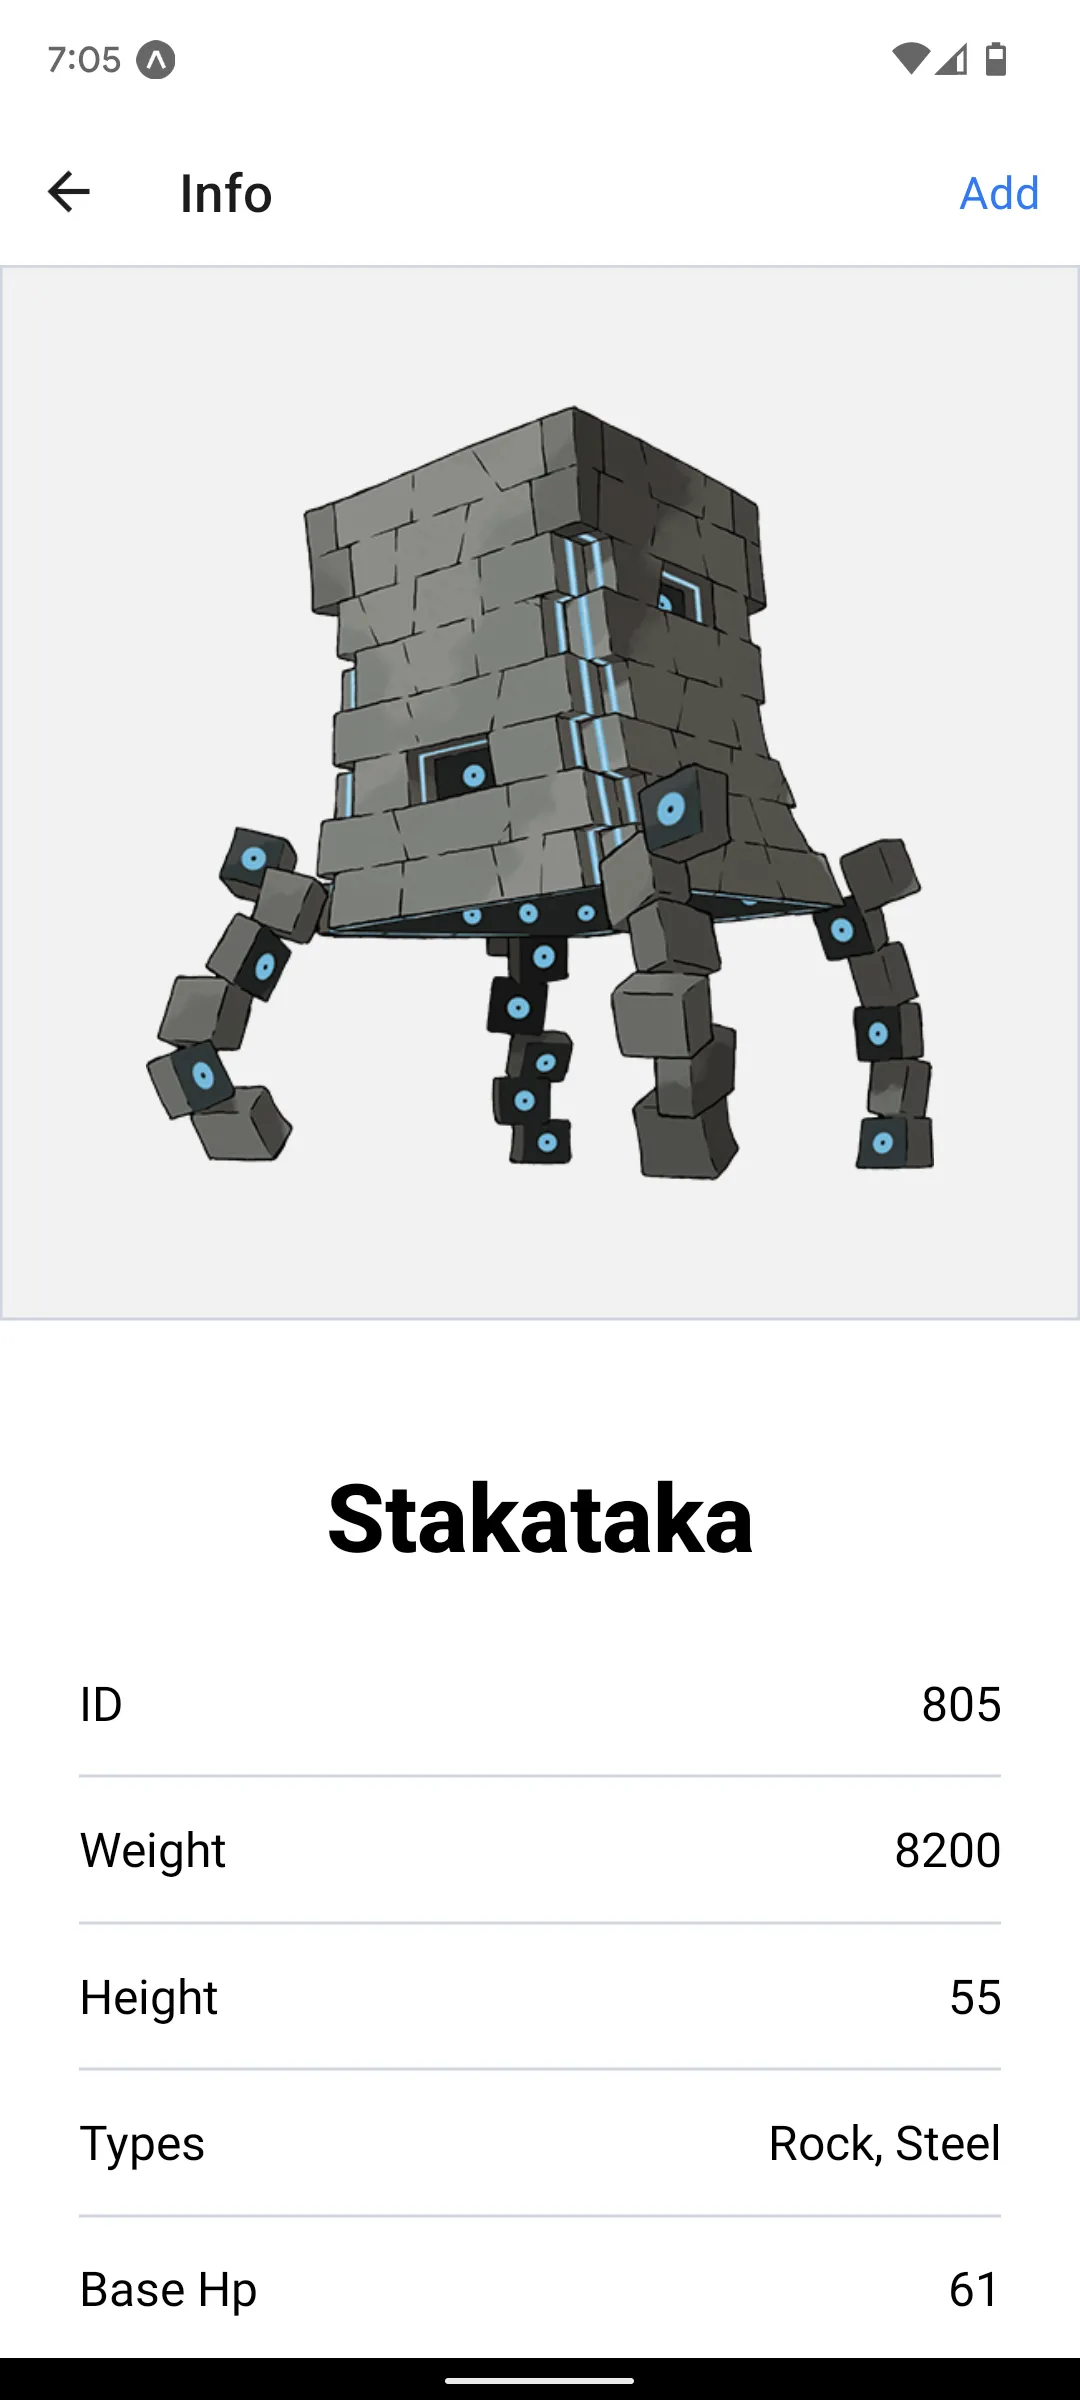 Info page in action for
Stakataka
Info page in action for
Stakataka
Whew! That's milestone-3-navigation. We're on the last stretch! Now we've got to add the functionality needed to add and remove a Pokemon.
Add/remove Pokemon feature
Okay. Just like we used react-navigation for the navigation, we're going to use a community package for storing Pokemon the user will be adding. Specifically, we're going to be using @react-native-async-storage/async-storage.
Storing data with this is a lot like using localStorage on the web. They're stored using key-value pairs, where both the key and the value have to be strings. To get around this, we're going to be using JSON.parse and JSON.stringify. We're going to be storing a list of our favorite Pokemon - their IDs specifically - in local storage so that the user can view info about their favorite Pokemon.
Okay, let's start by installing the library:
npm i @react-native-async-storage/async-storage
To make things simpler, let's write all of our storage functions in one file, which we'll place in utils/favorites.js:
import AsyncStorage from "@react-native-async-storage/async-storage";

const FAVORITES_KEY = "favorites";
FAVORITES_KEY refers to the key we'll be using to actually store the list of favorite Pokemon.
How would we go about getting a key-value pair using @react-native-async-storage/async-storage? Here's an asynchronous function that does that:
export async function getFavorites() {
    // Get all favorites
    let favorites = await AsyncStorage.getItem(FAVORITES_KEY);

    if (!favorites)
        favorites = []; // If favorites is null, set favorites to an empty array
    else favorites = JSON.parse(favorites);

    return favorites;
}
AsyncStorage, which we imported from @react-native-async-storage/async-storage, provides us with the function getItem to get the value of a key. It returns null if there isn't a key available. Inside getFavorites, we're getting the list of favorite Pokemon. If there aren't any, we can return an empty array; otherwise, we return the array of favorite Pokemon using JSON.parse.
So that covers what happens when we click on "My Pokemon" - we'll be getting a list of Pokemon back. Of course, no Pokemon will be in our list of favorites if we can't add them, so let's write a function for that as well:
export async function addFavorite(favoriteID) {
    // Add a favorite
    let favorites = await getFavorites();

    if (!favorites.includes(favoriteID)) {
        // Add the favorite to the favorites array if it doesn't already exist
        favorites.push(favoriteID);
        await AsyncStorage.setItem(FAVORITES_KEY, JSON.stringify(favorites));
    }
}
In addition to getItem, we also get to use setItem, which sets a provided key with a provided value, overriding any previous values. We start by getting our list of favorite Pokemon. If favoriteID isn't in there yet, we'll add it on, and then use JSON.stringify to actually update it in local storage.
The opposite of adding a favorite Pokemon is removing one, so we need to add that functionality as well:
export async function removeFavorite(favoriteID) {
    // Get current favorites
    let favorites = await getFavorites();
    favorites = favorites.filter(id => id !== favoriteID);
    await AsyncStorage.setItem(FAVORITES_KEY, JSON.stringify(favorites));
}
This just removes favoriteID out of local storage using filter. Should be pretty self-explanatory.
Lastly, a function that may come in handy:
export async function isFavorite(favoriteID) {
    // Determine if a Pokemon is already in favorites
    let favorites = await getFavorites();
    return favorites.includes(favoriteID);
}
Now we can begin implementing it! Let's do "Add" first. Previously, this is what we had in App.js for our info screen:
<Stack.Screen
    name="Info"
    component={Info}
    options={{
        headerRight: () => (
            <TouchableOpacity
                onPress={() => console.log("TODO")}
                style={{ marginRight: 15 }}>
                <Text
                    style={{
                        color: "#007aff",
                        fontSize: 17,
                        letterSpacing: 0.35
                    }}>
                    Add
                </Text>
            </TouchableOpacity>
        )
    }}
/>
There are a couple things we want to switch. First of all, we want to be able to add logic so that we can add the Pokemon if we haven't added it yet, and remove it if we've already added it. It's going to be easier to create a separate component that deals with this logic, so let's create such a component inside components/AddRemoveFavoriteButton.js:
import { useState, useEffect } from "react";
import { Text, TouchableOpacity } from "react-native";
import { useRoute } from "@react-navigation/native";
import { addFavorite, isFavorite, removeFavorite } from "../utils/favorites";

export default function AddRemoveFavoriteButton() {}
We start by importing the stuff we'll need, including the functions we just wrote. We also import useRoute from @react-navigation/native, which lets us access router parameters. We need this instead of directly using the route prop because the route prop is only passed to Stack.Screen components - in other words, it is only passed to screens, not the components on each screen.
Now let's add some code to our component:
const route = useRoute();
const [favorite, setFavorite] = useState(false);

useEffect(() => {
    const {
        params: { id }
    } = route;

    // Check if the Pokemon is a favorite
    isFavorite(id).then(favorite => {
        // If it is a favorite, set the favorite state to true
        favorite && setFavorite(true);
    });
}, []);
This code is pretty clear. We're just grabbing the router parameters with destructuring and passing the id parameter to isFavorite, which lets us know if the Pokemon is already favorited. If it is, setFavorite(true). Otherwise, leave it alone to the default value of false.
Okay, this means the JSX might look something like this:
return (
    <TouchableOpacity
        style={{
            marginRight: 15
        }}>
        <Text
            style={{
                color: "#007aff",
                fontSize: 17,
                letterSpacing: 0.35
            }}>
            {favorite ? "Remove" : "Add"}
        </Text>
    </TouchableOpacity>
);
This is basically what we're doing in App.js, but now we've moved it to its own component. Now, here's where the magic happens. We're going to pass an onPress prop to our TouchableOpacity so we can actually add and remove a Pokemon:
const toggleFavorite = () => {
    // Get the Pokemon ID from the route
    const {
        params: { id }
    } = route;

    if (favorite) {
        // If the Pokemon is a favorite, remove it from the favorites
        removeFavorite(id);
        setFavorite(false);
    } else {
        // Otherwise, add it to favorites
        addFavorite(id);
        setFavorite(true);
    }
};

return (
    <TouchableOpacity
        onPress={toggleFavorite}
        style={{
            marginRight: 15
        }}>
        <Text
            style={{
                color: "#007aff",
                fontSize: 17,
                letterSpacing: 0.35
            }}>
            {favorite ? "Remove" : "Add"}
        </Text>
    </TouchableOpacity>
);
Boom! And there you have it. The logic is pretty self-explanatory. Now we just need to replace the current code in App.js with this:
// ...
import AddRemoveFavoriteButton from "./components/AddRemoveFavoriteButton";

// ...

export default function App() {
    // ...
    return (
        { // ... }
        <Stack.Screen
            name="Info"
            component={Info}
            options={{
                headerRight: () => <AddRemoveFavoriteButton />
            }}
        />
        { // ... }
    );
}
Of course, we won't actually be able to see our favorite Pokemon, since we don't have a screen for it. Let's fix that with a new screen inside screens/Favorites.js:
import { useState, useEffect } from "react";
import {
    ActivityIndicator,
    FlatList,
    StyleSheet,
    Text,
    View
} from "react-native";
import PreviewCard from "../components/PreviewCard";
import { getFavorites } from "../utils/favorites";

const styles = StyleSheet.create({
    container: { backgroundColor: "white", flex: 1 }
});

export default function Favorites({ navigation }) {
    return <View style={styles.container}></View>;
}
Once again, typical boilerplate code. Next step! Let's update the component:
const [favoritesList, setFavoritesList] = useState([]);
const [loading, setLoading] = useState(true);

useEffect(() => {
    const unsubscribe = navigation.addListener("focus", () => {
        // Runs when navigating forward or backward to this screen
        const getFavoritesAndInfo = async () => {
            const favoritesByID = await getFavorites();

            let favorites = [];
            for (let i = 0; i < favoritesByID.length; i++) {
                const req = await fetch(
                    `https://pokeapi.co/api/v2/pokemon/${favoritesByID[i]}`
                );
                const data = await req.json();

                let pokemon = {
                    name: data.name,
                    id: data.id,
                    image: data.sprites.other["official-artwork"].front_default
                };
                favorites.push(pokemon);
            }

            setFavoritesList(favorites);
            setLoading(false);
        };

        getFavoritesAndInfo();
    });

    // Return the function to unsubscribe from the event so it gets removed on unmount
    return unsubscribe;
}, [navigation]);
We're storing state with favoritesList and loading, both of which have pretty self-explanatory names. But our useEffect is a little bit different. We're passing in navigation as a second argument (inside an array), which essentially tells the hook not to run unless the navigation is being changed. In other words, we're only going to run this code when we get to this screen. We then return a cleanup function (a function that gets removed on unmount) so that we can keep things relatively efficient. This is just a normal React hook!
Otherwise, the rest of the code is relatively similar to the code we wrote while generating our preview list of Pokemon, except instead of generating a list of random Pokemon we're taking the IDs returned by getFavorites and using those to fetch information about the favorited Pokemon.
Now to show preview cards for each of the favorited Pokemon. We can just use the PreviewCard component for this:
return (
    <View style={styles.container}>
        {!loading ? (
            favoritesList.length > 0 ? (
                <FlatList
                    data={favoritesList}
                    keyExtractor={item => item.id}
                    renderItem={({ item }) => (
                        <PreviewCard {...item} navigation={navigation} />
                    )}
                    contentContainerStyle={{
                        paddingTop: 30,
                        paddingBottom: 60
                    }}
                />
            ) : (
                <View
                    style={{
                        flex: 1,
                        alignItems: "center",
                        justifyContent: "center"
                    }}>
                    <Text style={{ fontSize: 24 }}>You have no favorites!</Text>
                    <Text style={{ fontSize: 18, marginTop: 10 }}>
                        Go to the Home screen and add some favorites!
                    </Text>
                </View>
            )
        ) : (
            <View
                style={{
                    flex: 1,
                    alignItems: "center",
                    justifyContent: "center"
                }}>
                <Text style={{ fontSize: 24 }}>Loading...</Text>
                <ActivityIndicator size="large" style={{ marginTop: 20 }} />
            </View>
        )}
    </View>
);
If we're not loading, we can either display the preview cards for the user's favorite Pokemon or we can let the user know they haven't added any favorite Pokemon yet. Otherwise, we'll just display a loading screen.
The last thing we need to do is actually add screens/Favorites.js as a screen, or this won't actually work. This is the current code for the Home screen:
<Stack.Screen
    name="Home"
    component={Home}
    options={({ navigation }) => ({
        headerRight: () => (
            <TouchableOpacity
                onPress={() => console.log("TODO")}
                style={{ marginRight: 15 }}>
                <Text
                    style={{
                        color: "#007aff",
                        fontSize: 17,
                        letterSpacing: 0.35
                    }}>
                    My Pokemon
                </Text>
            </TouchableOpacity>
        )
    })}
/>
We didn't mention it before, but do you notice how there's a navigation prop being passed in the prop options? We can finally make use of that by replacing console.log("TODO"):
navigation.navigate("Favorites");
And of course, we need to create the Favorites screen. Let's add it after the Info screen:
<Stack.Screen name="Favorites" component={Favorites} />
Make sure you have the screen imported:
import Favorites from "./screens/Favorites";
Here's the final result:
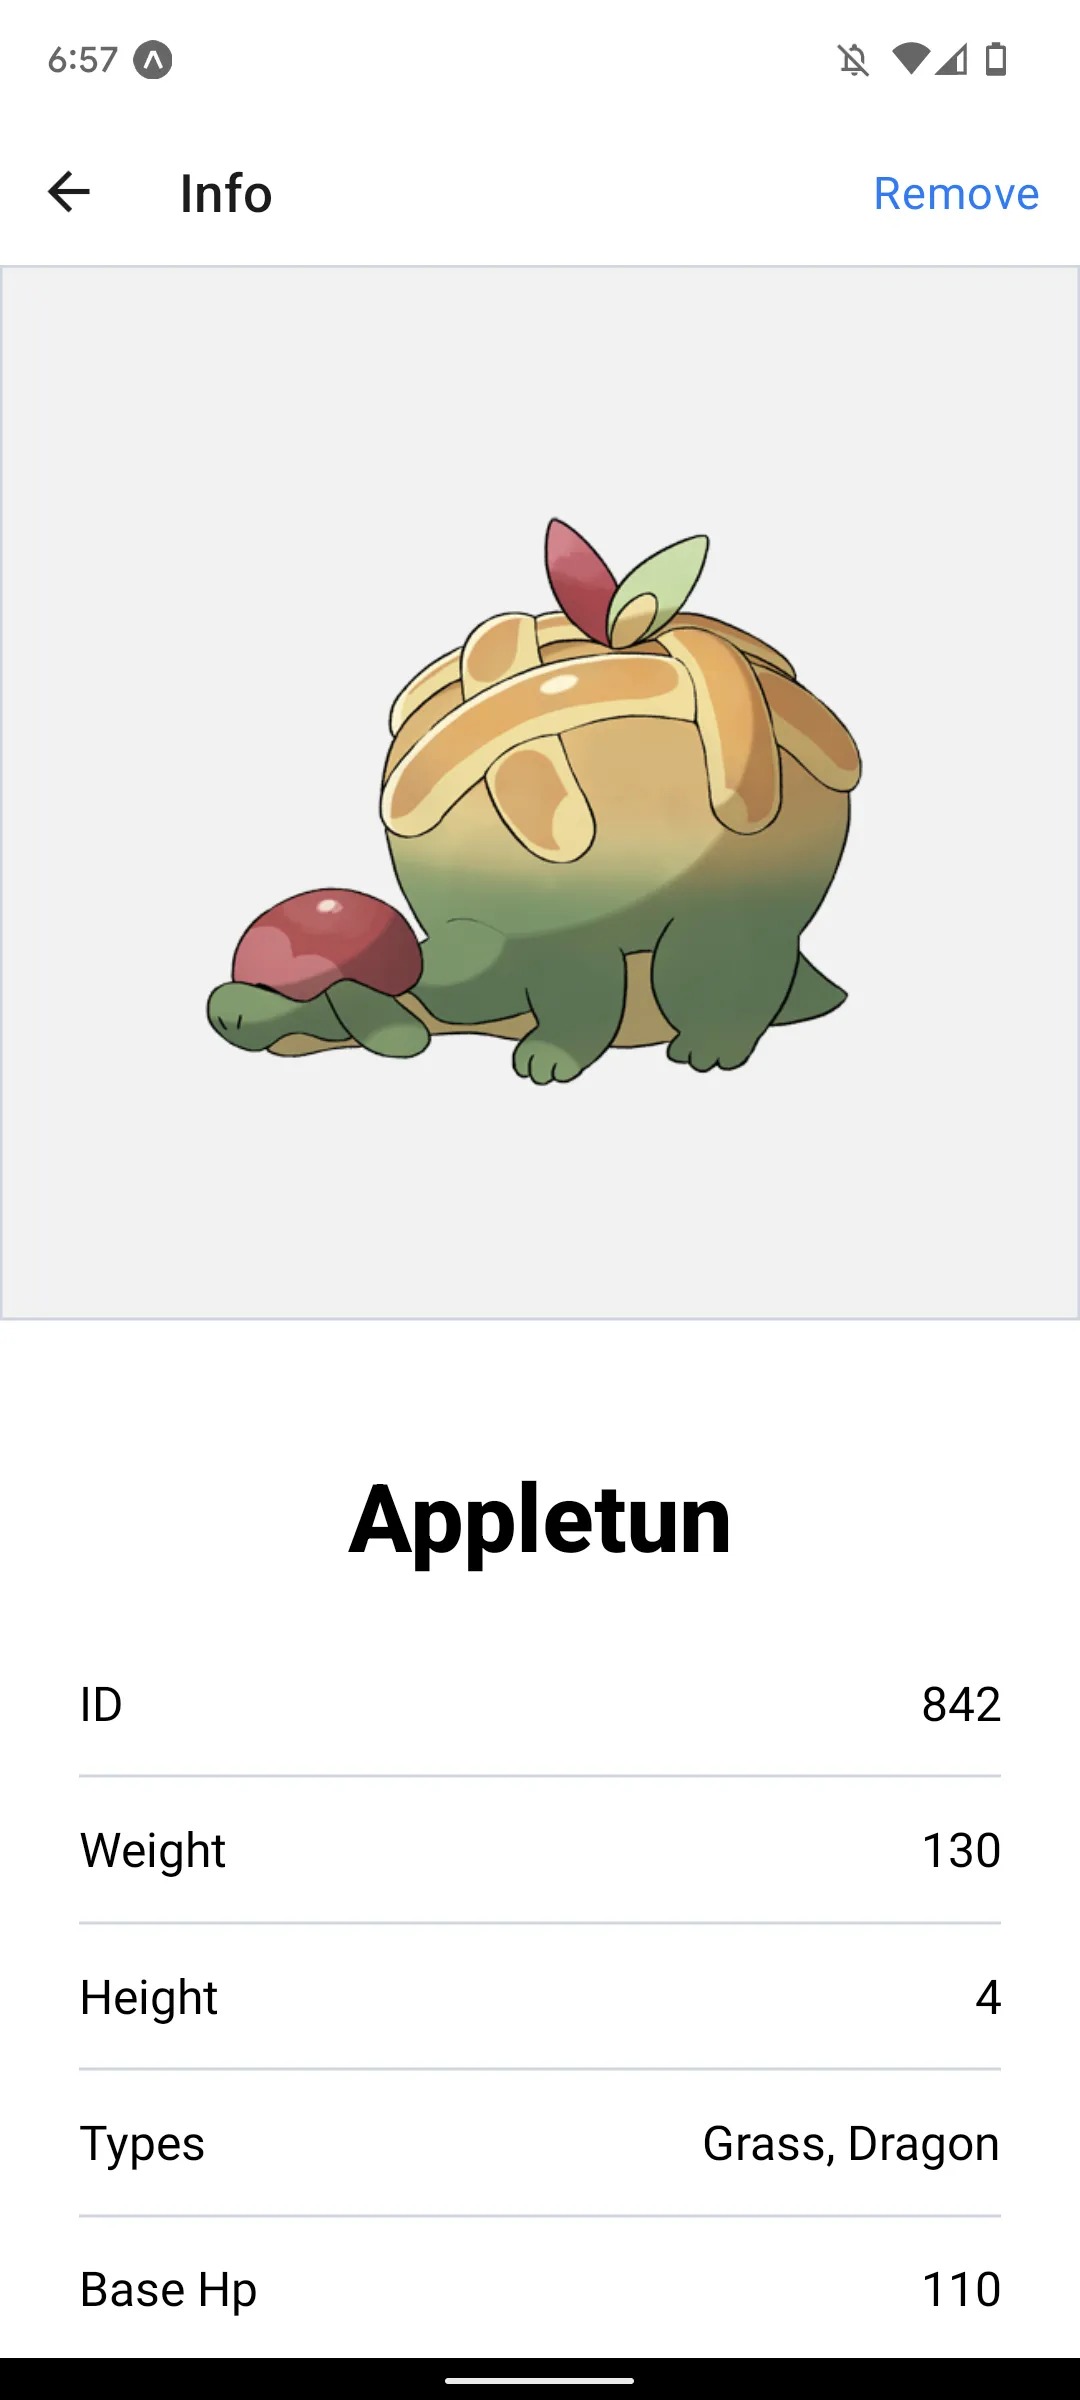 Appletun has already been added, so the button says "Remove", as
expected
Appletun has already been added, so the button says "Remove", as
expected
Conclusion
We are finally done! Some resources to continue taking a look at:
- The GitHub repository containing all the code
- The React Native documentation
- The Expo documentation
And of course, some exercises:
- Learn how to deploy an app on Expo! Also, try learning how to eject an app from Expo - that is, pure React Native, no Expo.
- Experiment with the different navigation methods provided by
react-navigation - Try out another React Native library!
- Incorporate some of the other endpoints provided by PokeAPI into our Pokedex!
Hey! Have feedback? Was the pace of this workshop too fast or too slow for you? Was there a typo or bug? Let us know!